
Configure the data privacy settings of your new jurisdiction
To configure the data privacy settings of your new jurisdiction:
- Go to
 Manage>Property Settings>Jurisdictions.
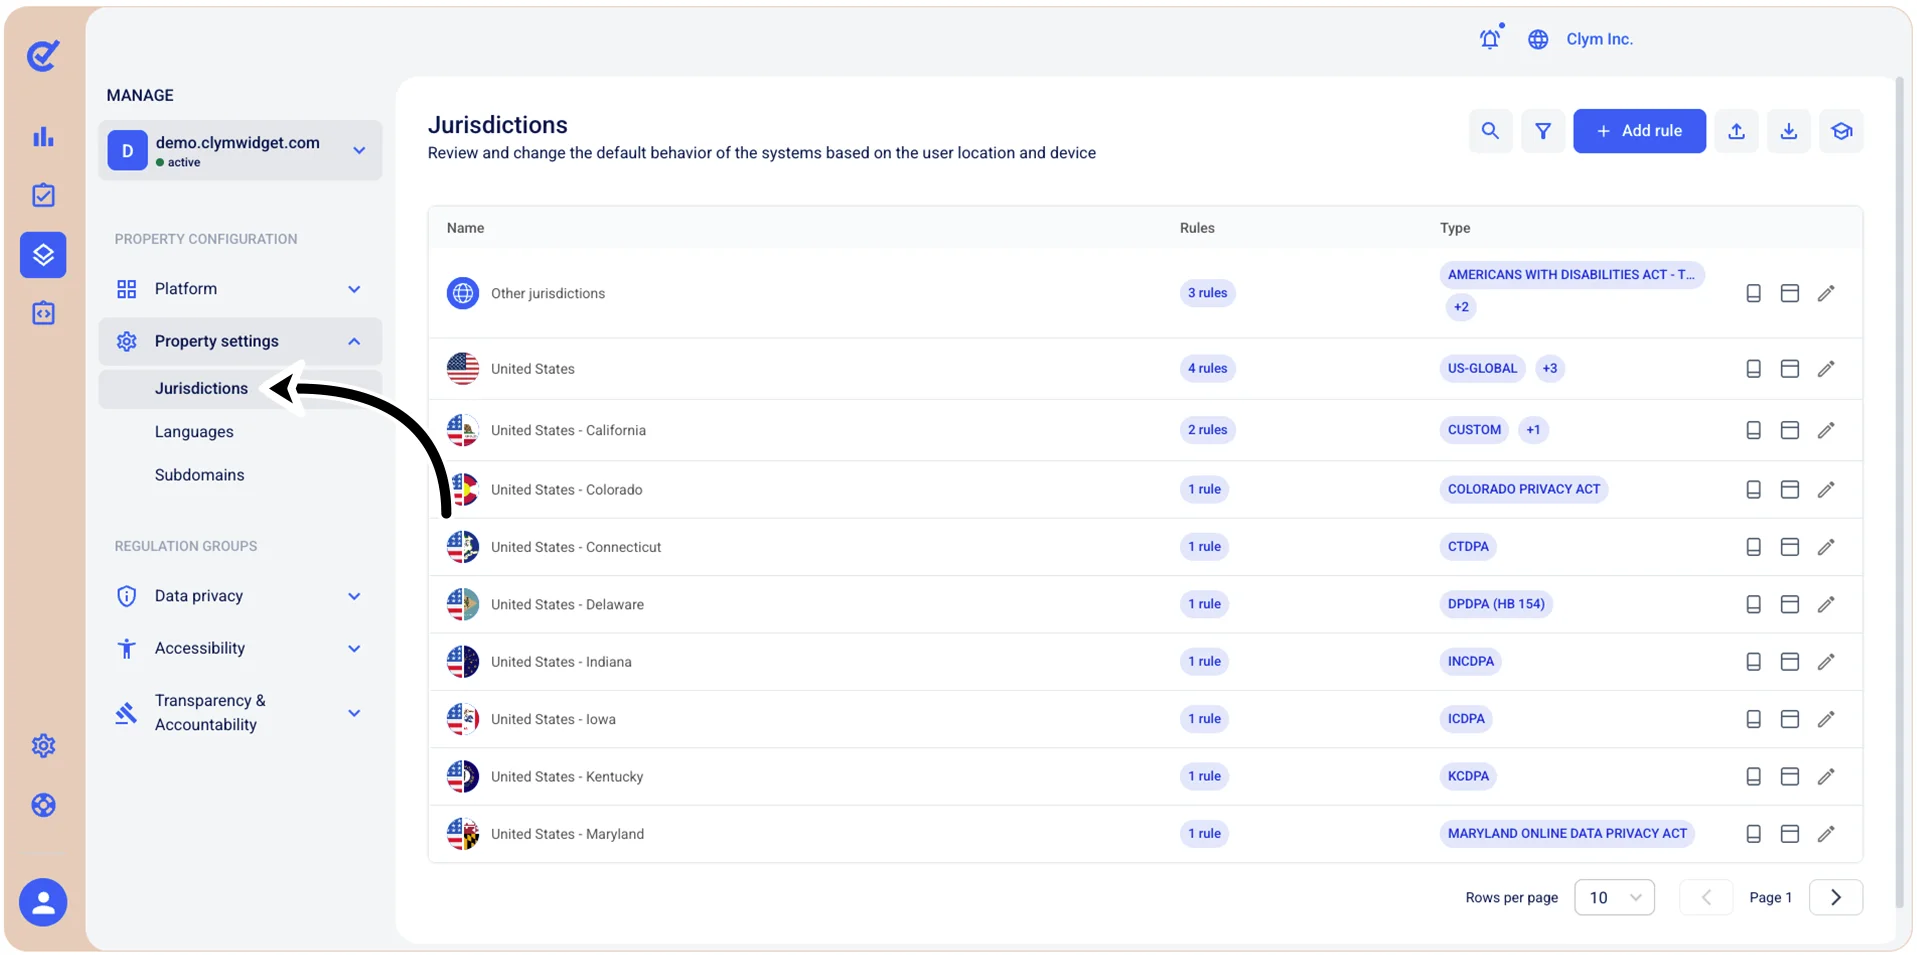
- In the Jurisdictions section, select
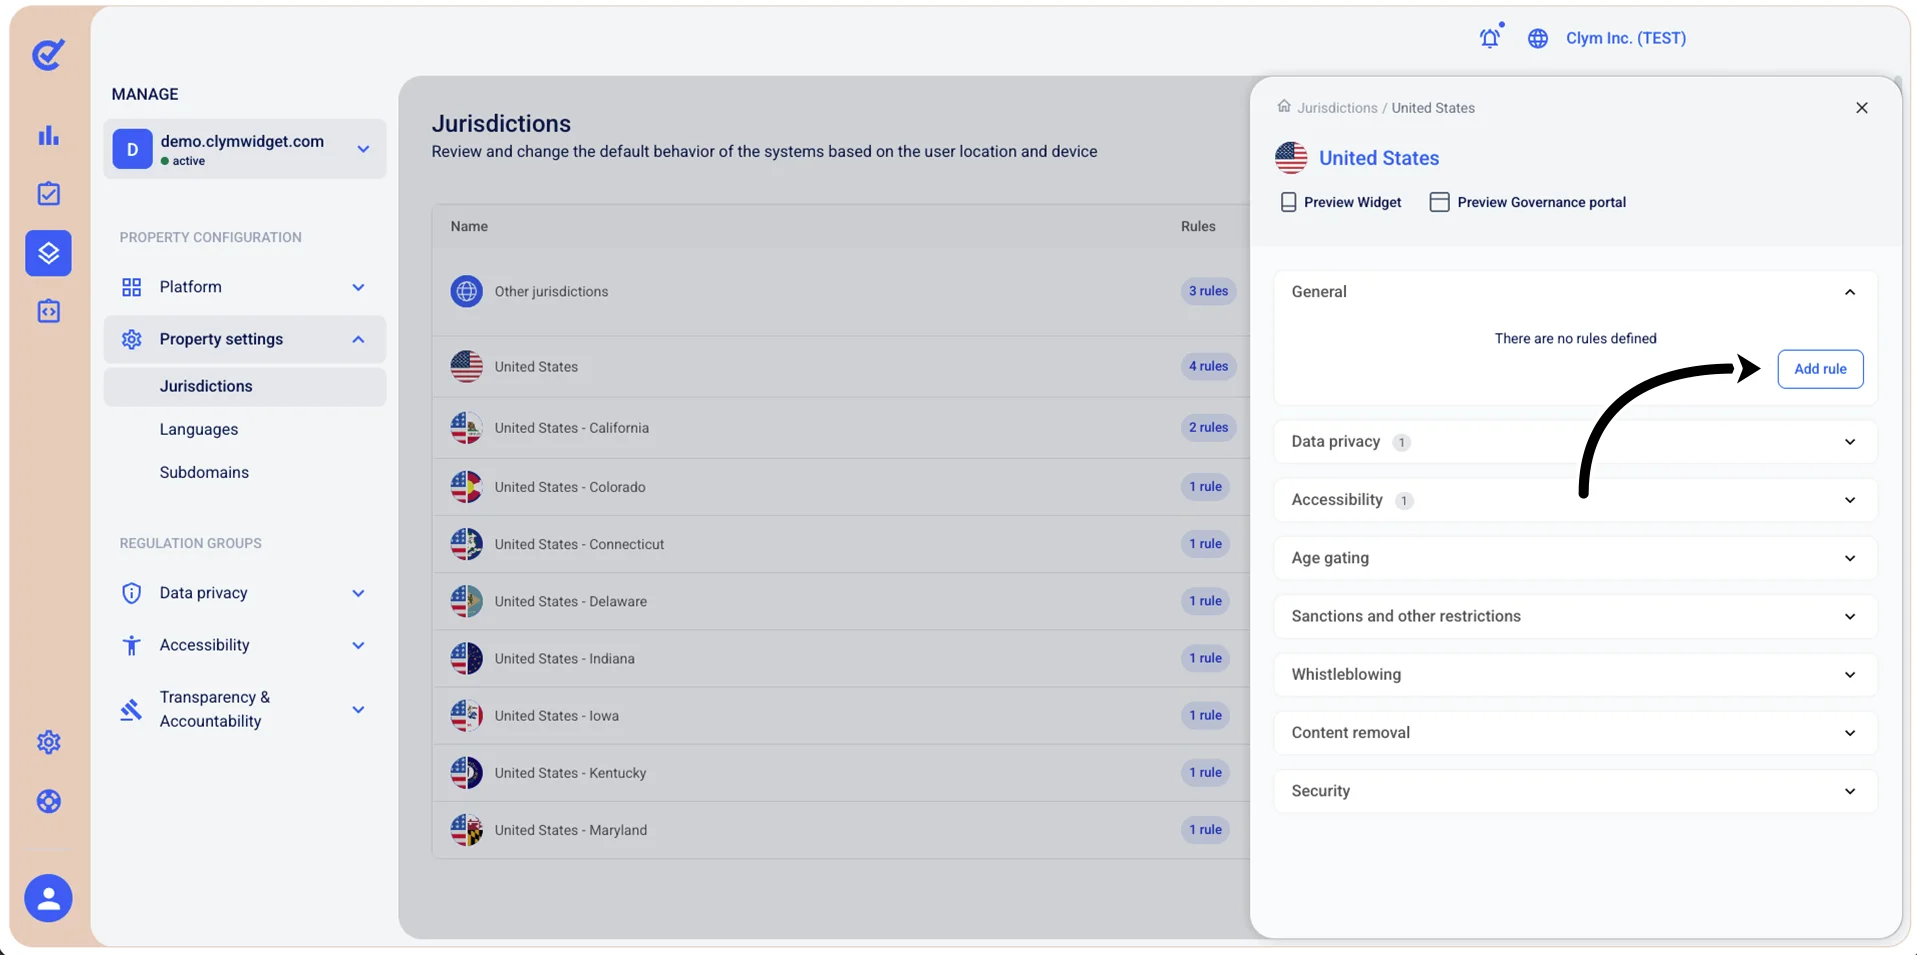
 Edit next to the new jurisdiction that you have created. Then, expand Data privacy and select Add rule.
- Under Rule configuration, to configure the widget, select Widget and then configure the Widget Data Privacy settings, as follows:
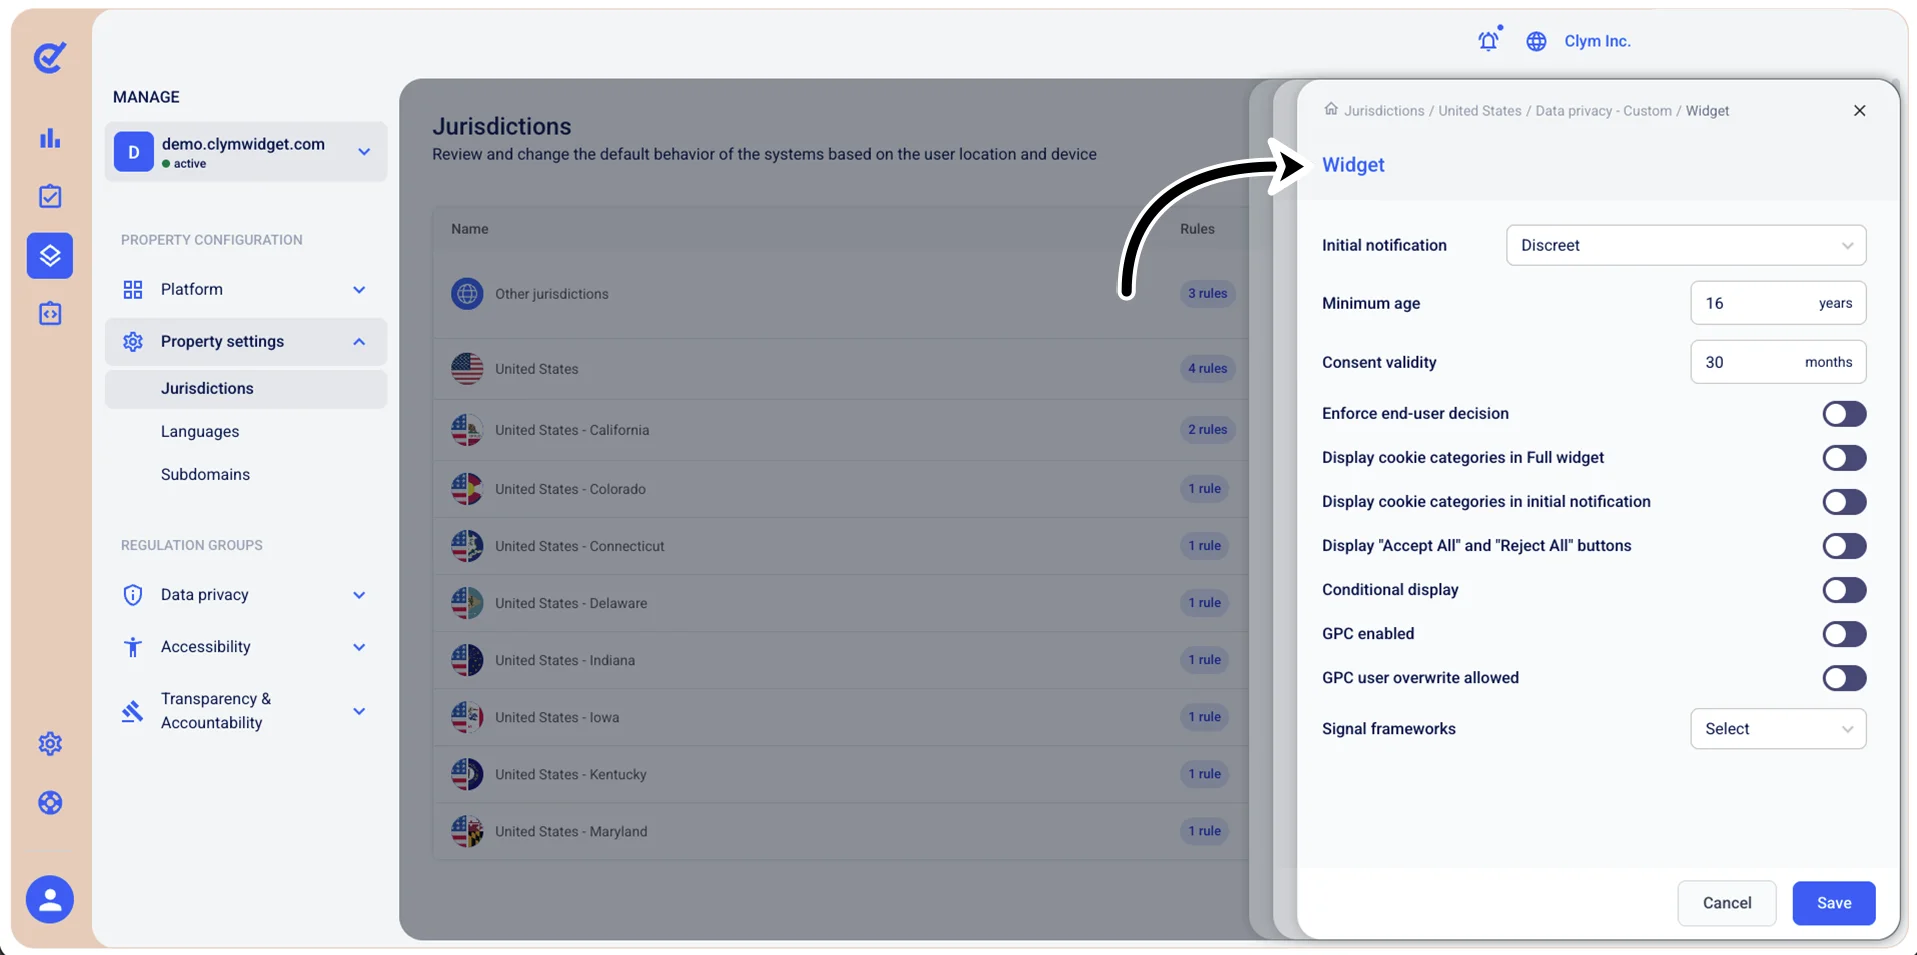
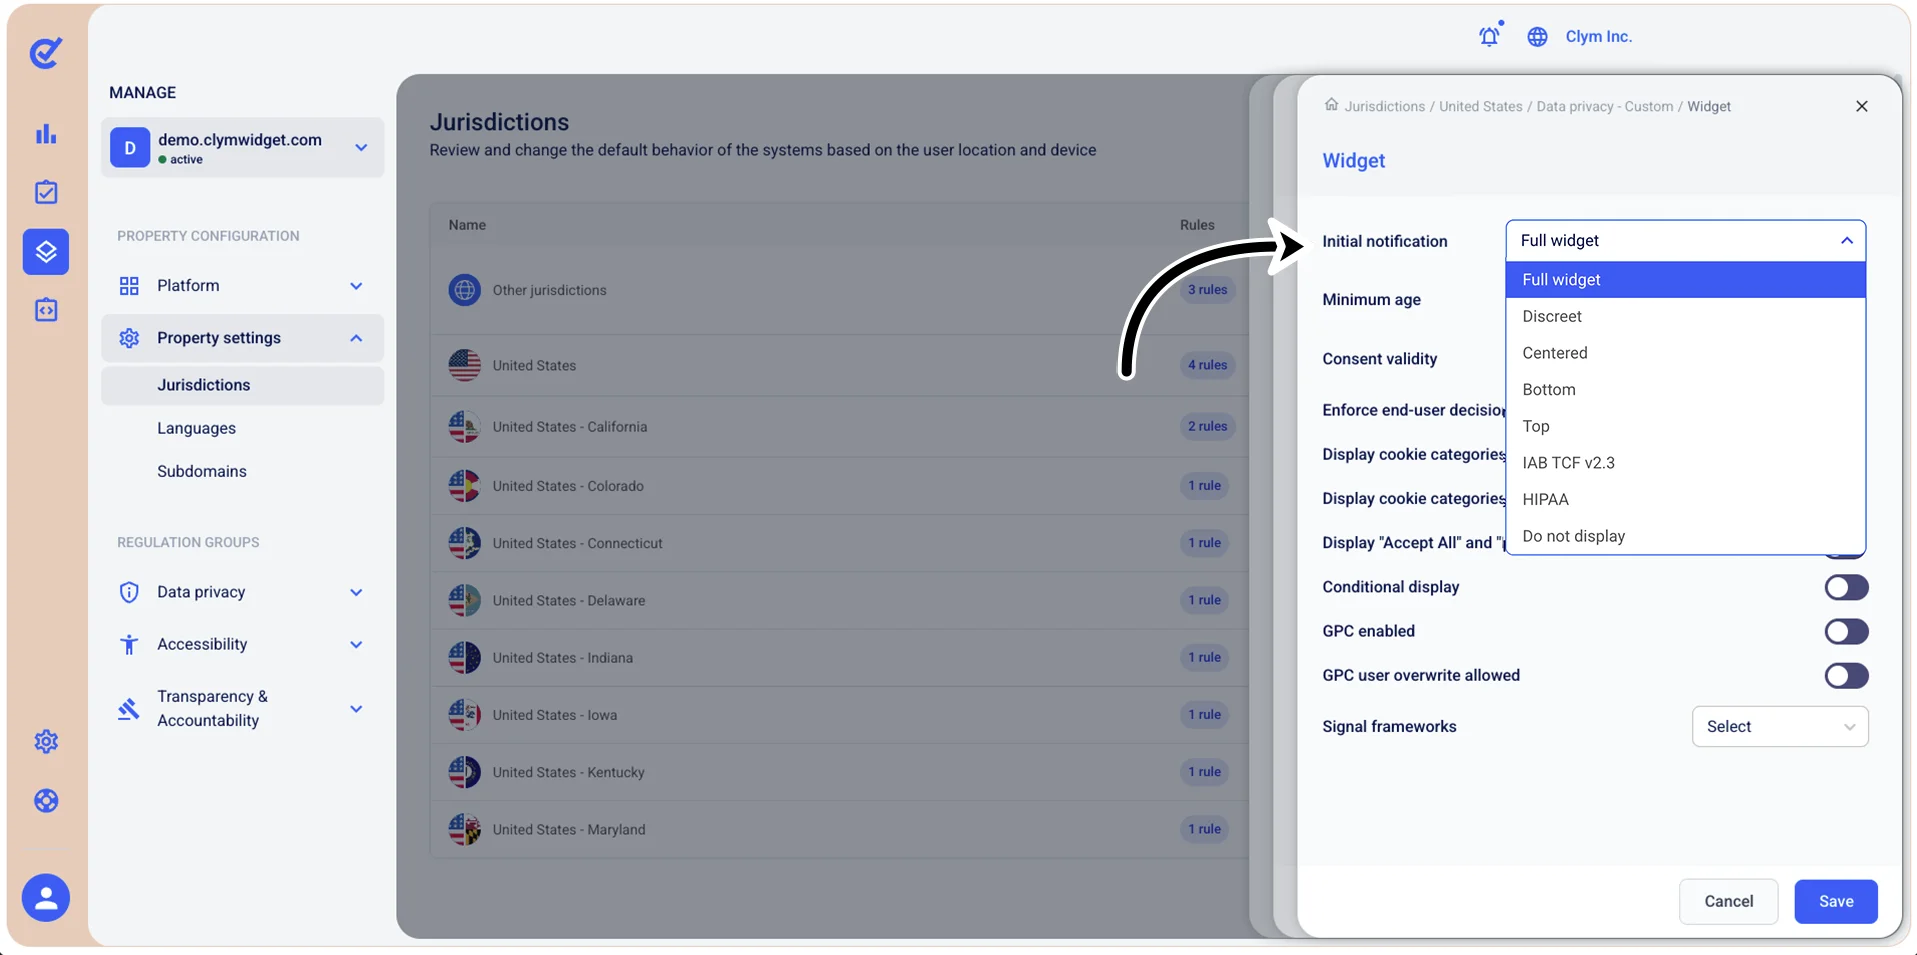
- Initial notification: Refers to the type of pop-up people want to see the first time the widget loads on the page (there's a range they can choose from). Select how you want the initial notification to be displayed (for example, display in full, discreet, centered, IAB TCF v2.3 or HIPAA compliant etc.).
- Minimum age: The recommended minimum age for users coming from that country, based on what type of content they display on the site.
- Consent validity: The period for which user consent is saved.
- Enforce end-user decision: Refers to the option of allowing the user to select X and not provide consent (not enforced) and the consent window sticking there on the screen until the user makes a decision in this respect.
- Display cookie category in Full widget: Toggle to display each cookie category in the full widget format.
- Display cookie categories in initial notification: Toggle on if you want to display the cookie categories in the initial notification. That is, to show more than Save preferences or Accept all / Reject all, and show how many cookies/from which category you have in the initial notification (as opposed to showing them only when the user interacts with the widget).
- Display “Accept All” and “Reject All” buttons: Toggle on to display Accept All and Reject All buttons (recommended). If toggled off, the display cookie category flags will be displayed.
- Conditional display: Enables you to include pages (paths) exclusively or explicitly remove the widget from pages. Either the Do not load widget on the following pages or the Load widget only on the following pages option becomes activated.
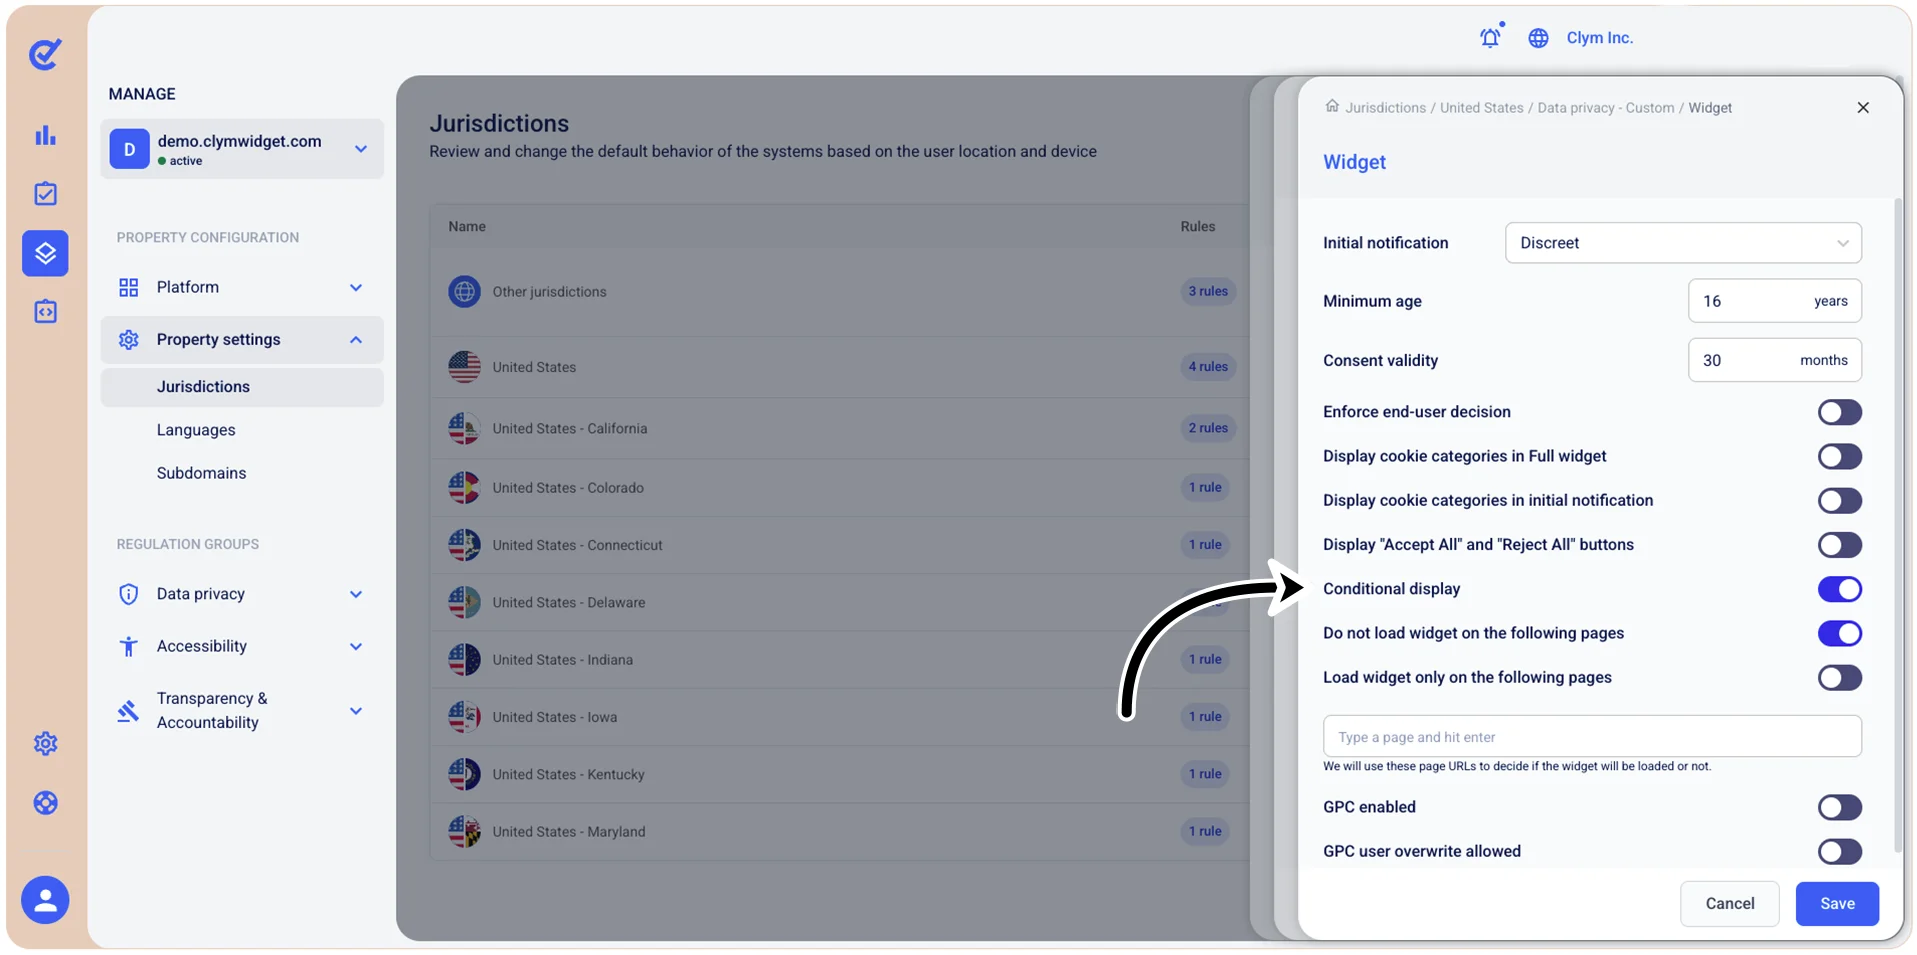
- GPC enabled: Toggle on to activate GPC (Global Privacy Control). If toggled off, users cant opt in from GPC affected categories.
- GPC user overwrite allowed: Toggle on to allow users to overwrite GPC.
- Signal frameworks: Toggle on to personalize the browser signals even more, to default to what the law says for certain US states (different in each one), so that you're following "the rules". Not mandatory to select it, users can go with a mix of settings, but we always recommend sticking to what we provide pre-configured as we take effort to make sure it matches the requirements from the regulations guideline.
- When finished, select Save to return to Rule configuration.
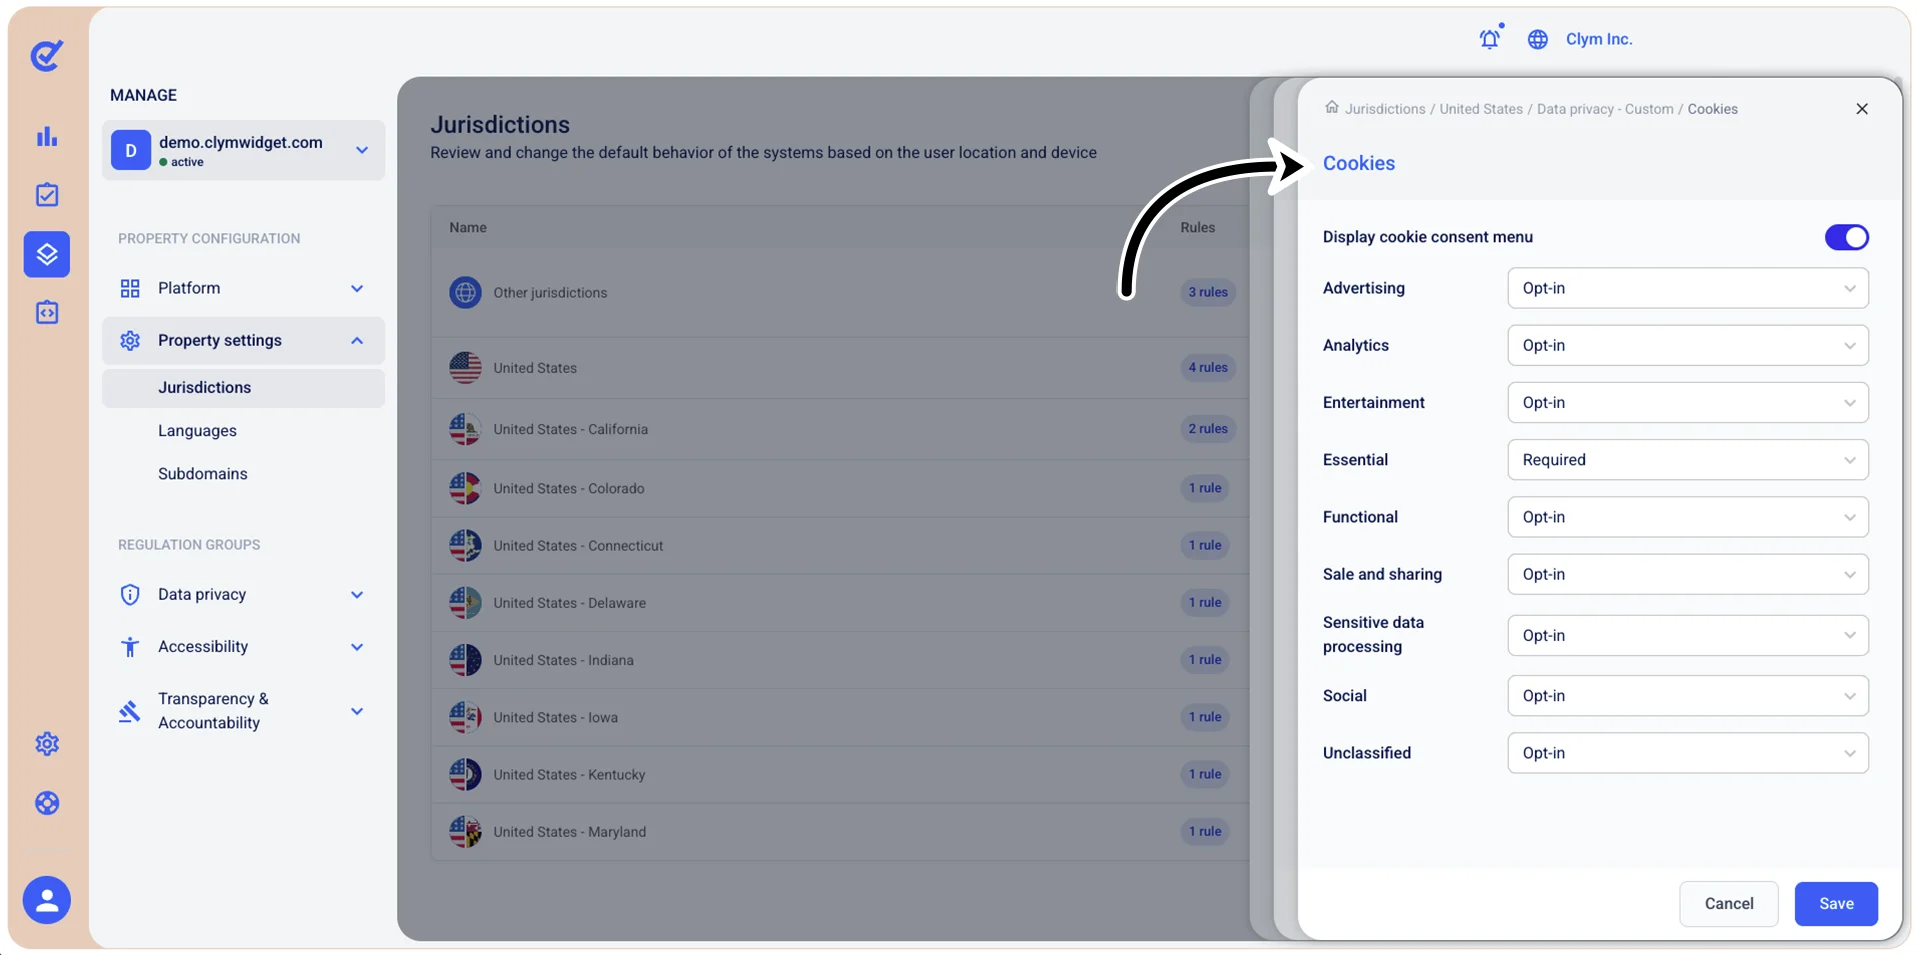
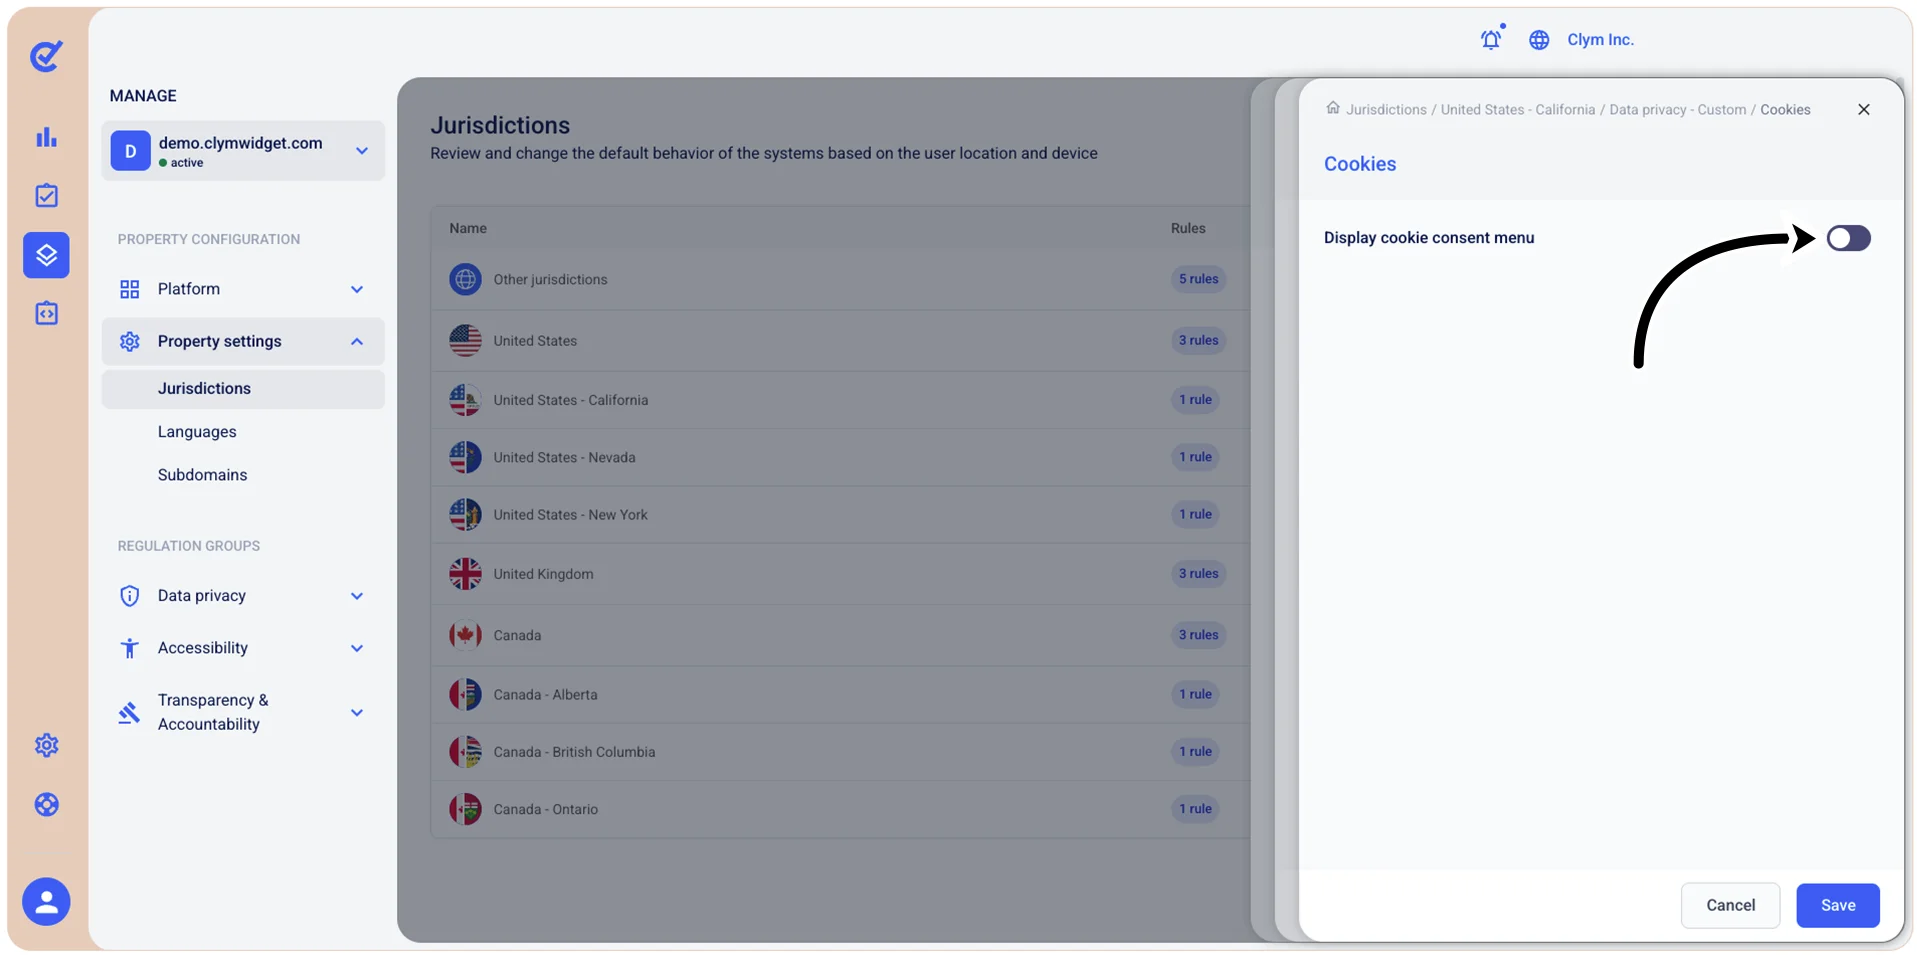
- Next, under Rule configuration, to configure the cookies, select Cookies and then toggle Display cookie consent menu on or off, according to your preferences. If you toggle this option on, configure the cookies consent menu by selecting Opt-in, Opt-out or Required next to the respective category, depending on how you want the categories managed by the users.
- When finished, select Save to return to Rule configuration.
- Next, under Rule configuration, to configure the cookies, select Cookies and then toggle Display cookie consent menu on or off, according to your preferences. If you toggle this option on, configure the cookies consent menu by selecting Opt-in, Opt-out or Required next to the respective category, depending on how you want the categories managed by the users.
- When finished, select Save to return to Rule configuration.
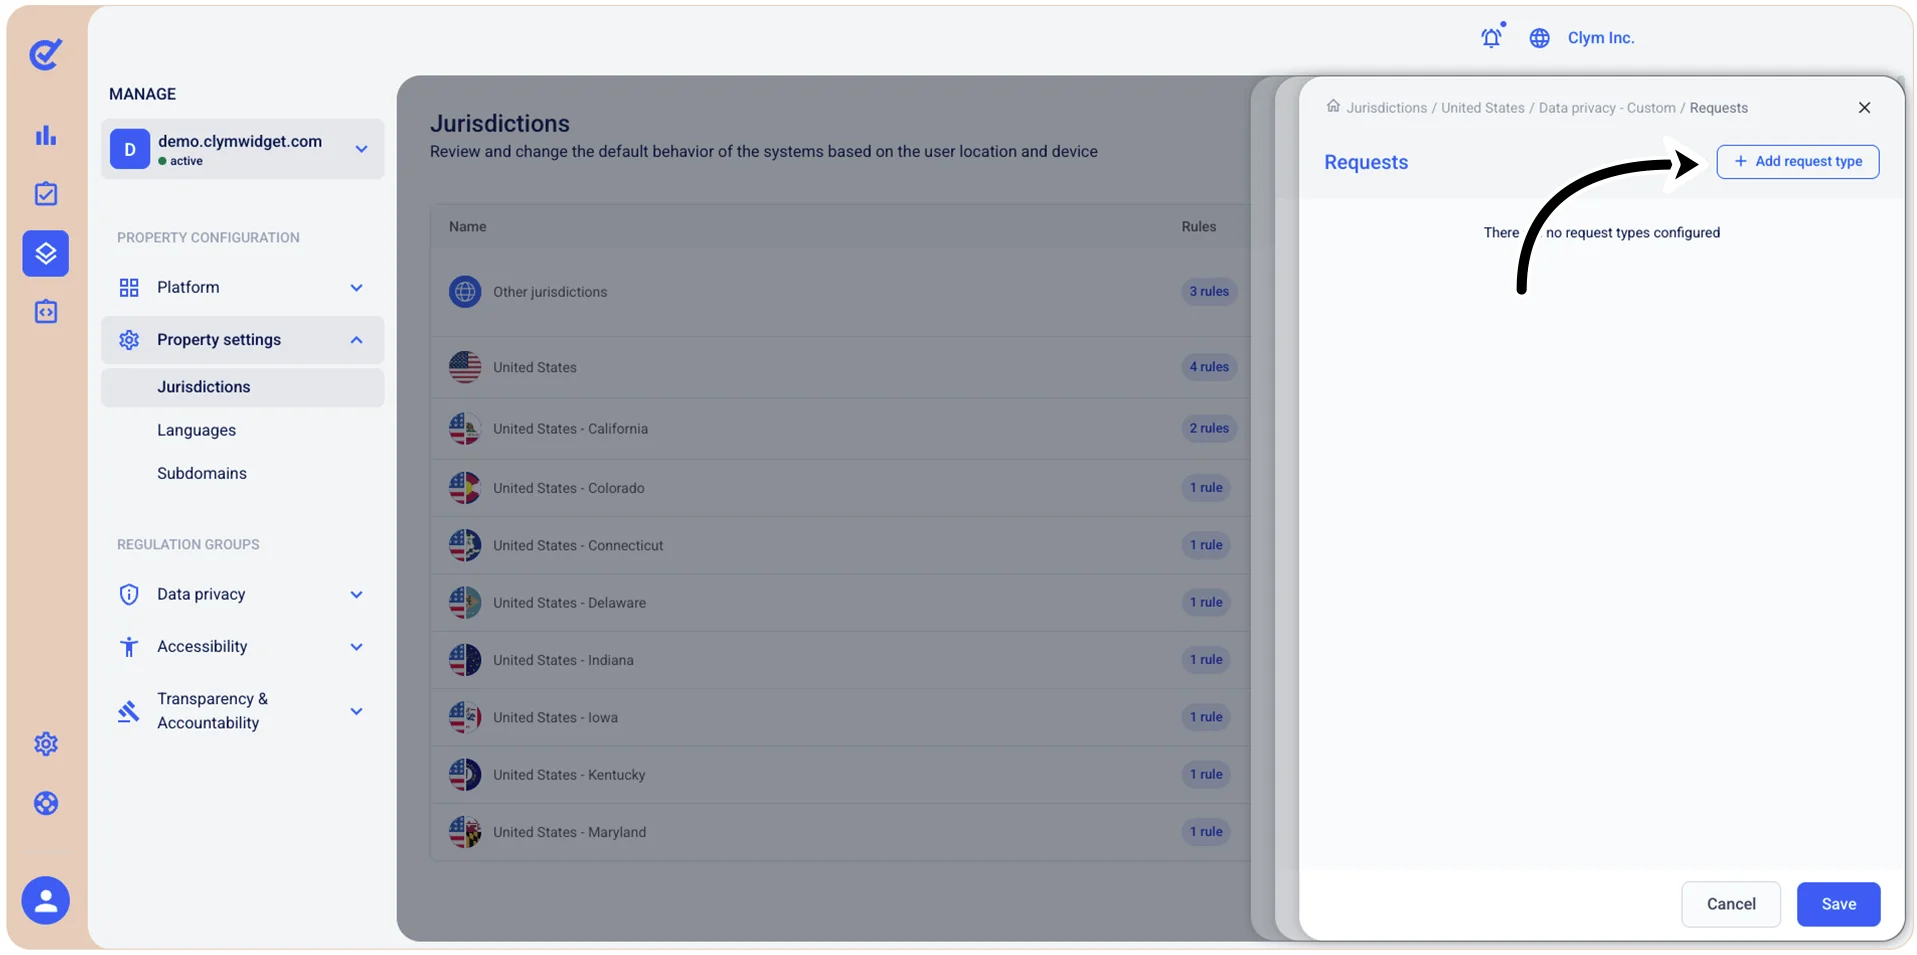
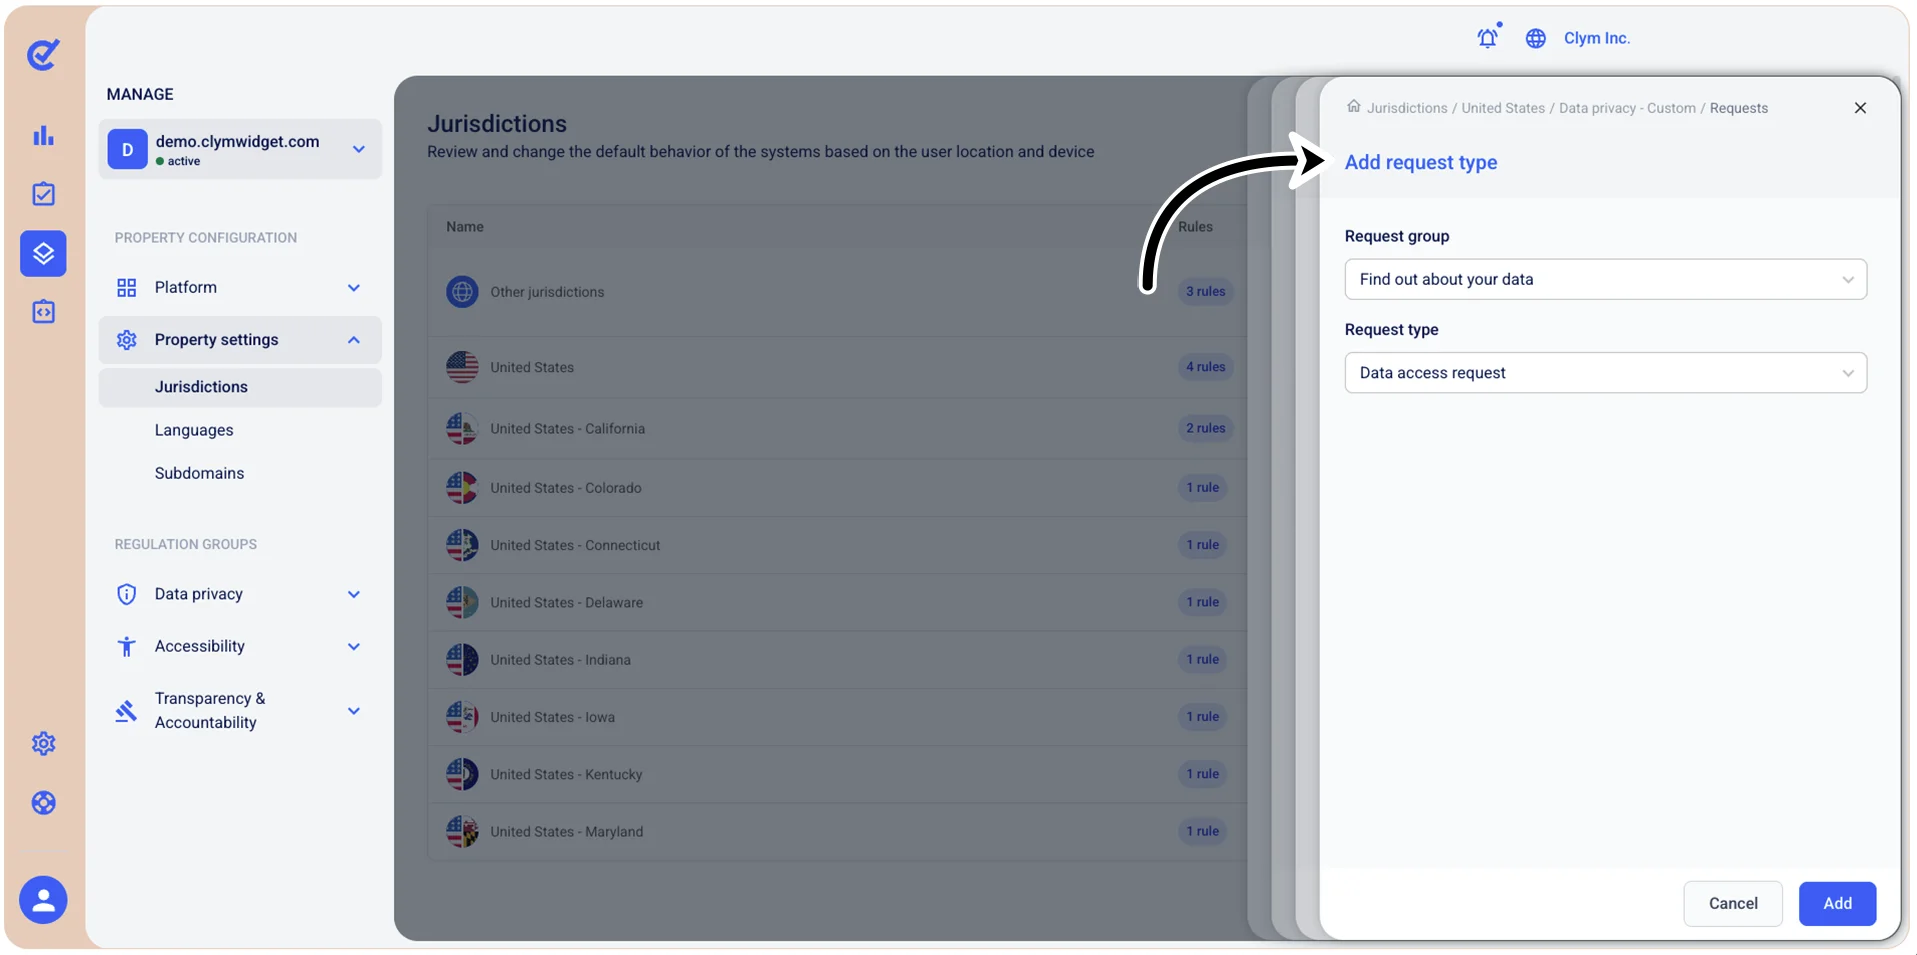
- Next, under Rule configuration, to configure the requests the users may file, select Requests and then select Add request type.
- Under Add request type, select the desired Request group and Request type from the respective lists.
- When finished, select Save to return to Rule configuration.