
Configure the age gating settings of your new jurisdiction
If applicable to your business, you can configure age gating settings in your jurisdictions.
To configure age gating settings:
- Go to
 Manage>Property Settings>Jurisdictions.
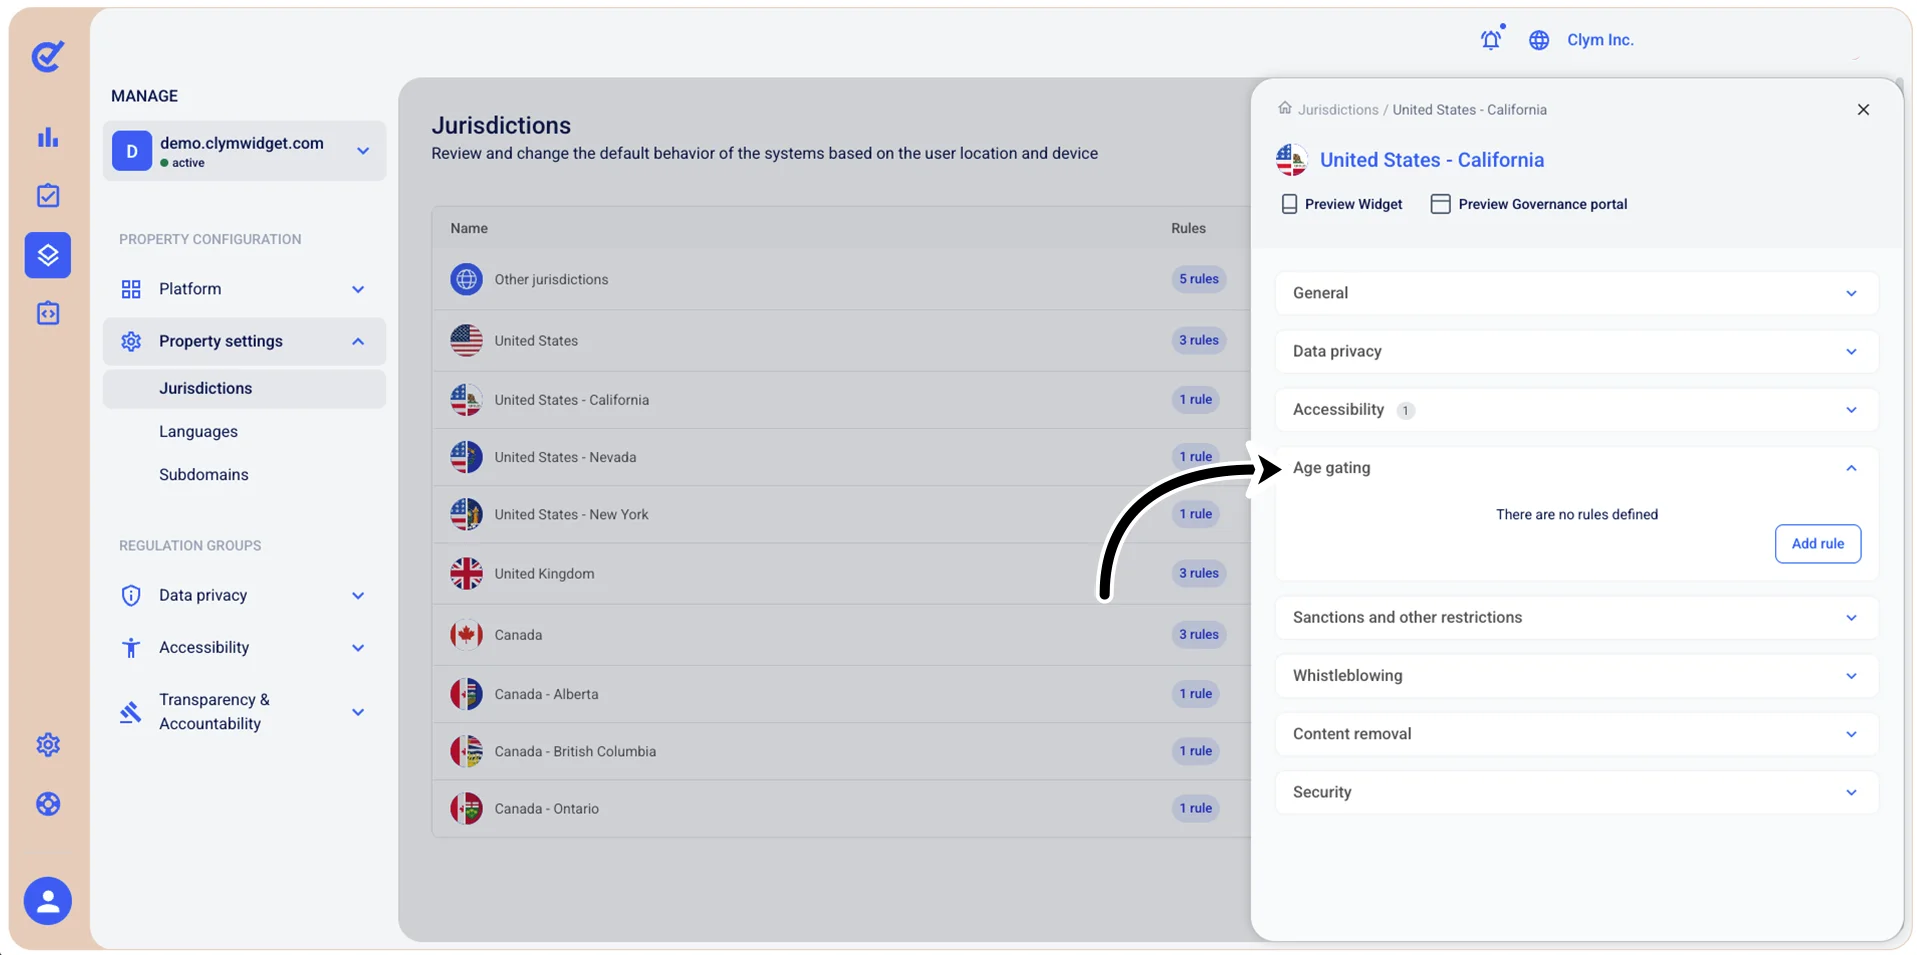
- In the Jurisdictions section, select the jurisdiction where you would like to configure Age gating and click
 Edit next to the desired jurisdiction. Then, expand Age gating and select Add rule.
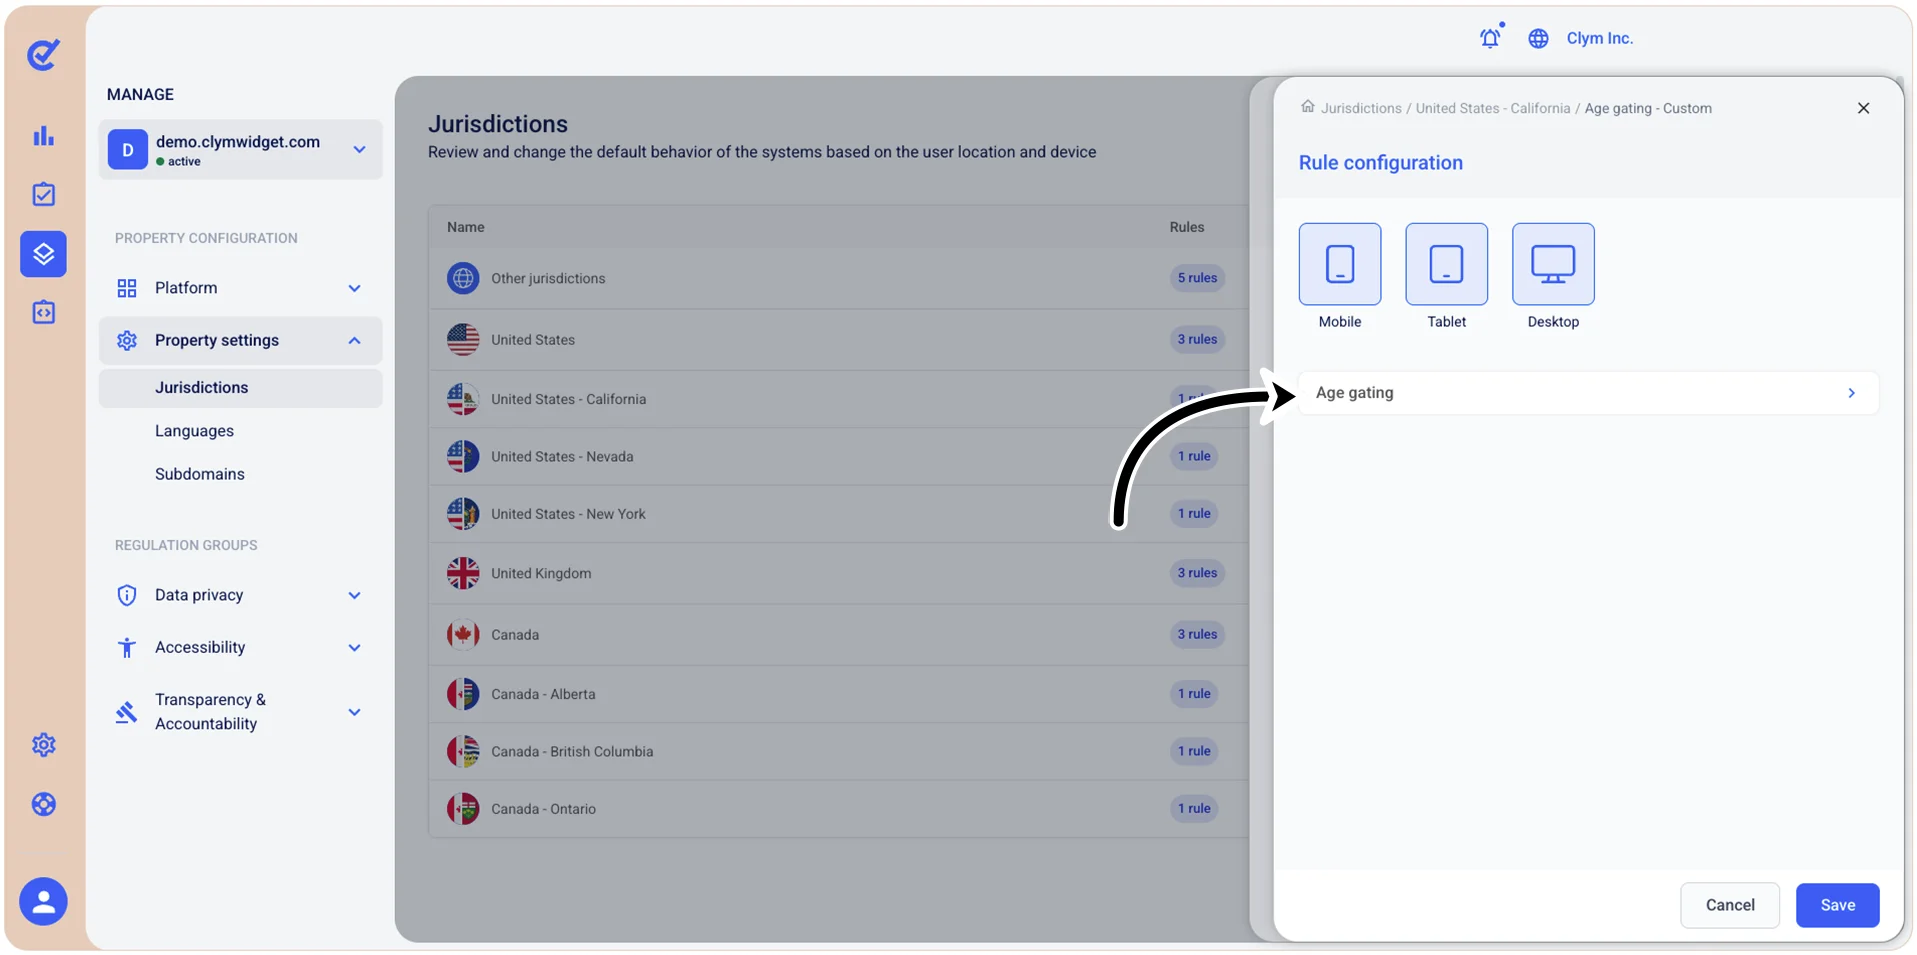
- Under Rule configuration, the highlighted mobile, tablet, and desktop icons mean that the widget will be displayed on all these three mediums; to prevent the widget from being displayed on any of these mediums, simply clear the desired selection(s). You can make combinations of multiple mediums, such as both tablet and mobile, or both tablet and desktop, or mobile only. Then, select Age gating below the mobile/tablet/desktop icons to configure the minimum age settings of the widget.
- Next, in the Age gating screen, configure the age gating features, as follows:
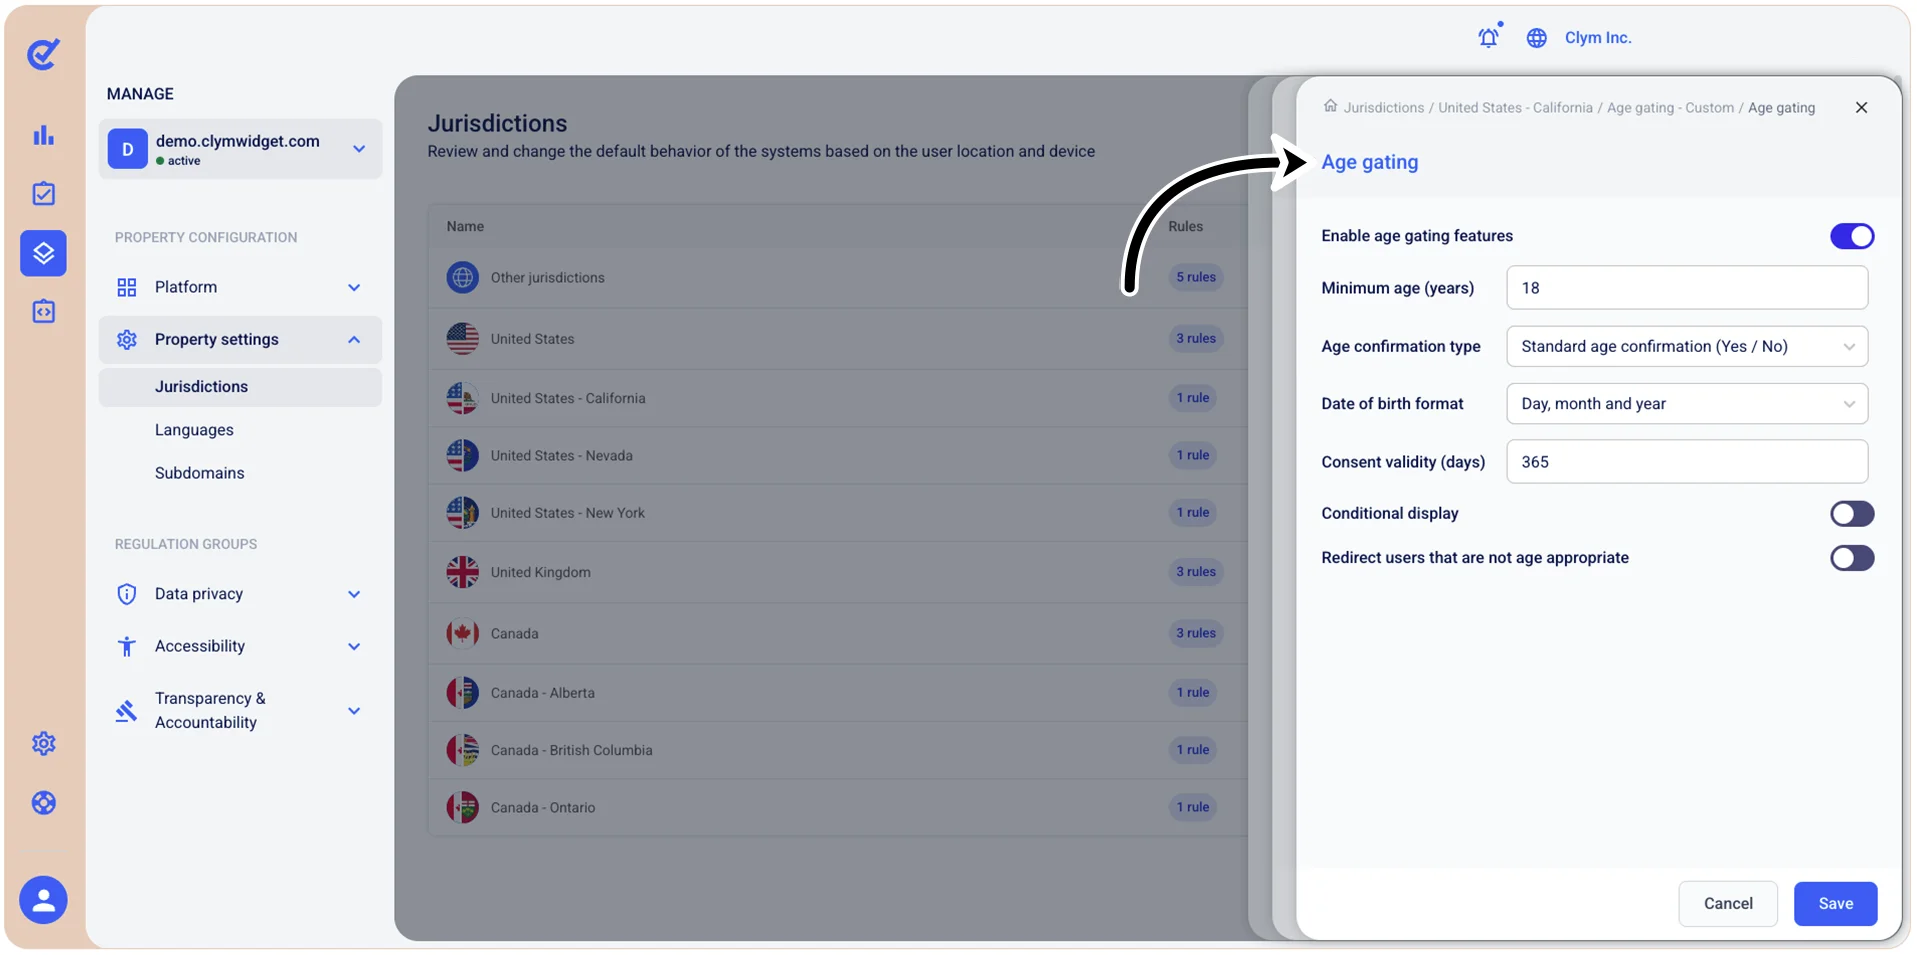
- Enable age gating features: Toggle on to activate age gating for this jurisdiction.
- Minimum age (years): Enter the minimum age a user must be to access the content.
- Age confirmation type: Select how the age check is presented to the user:
- Standard age confirmation (Yes / No): Displays a simple prompt asking the user to confirm they meet the minimum age requirement.
- Provide the date of birth: Users are required to enter their date of birth.
- Date of birth format: Select the desired date of birth format.
- Consent validity: Select how many days the user consent for age gating is valid.
- Conditional display: If toggled on, the age gate is only shown to users who meet specific conditions, rather than all users.
- Redirect users that are not age appropriate: If toggled on, users who do not meet the minimum age requirement are automatically redirected, rather than simply being shown an error or denied access.
- When finished, select Save to return to Rule configuration.