
Install the Widget on a WordPress website
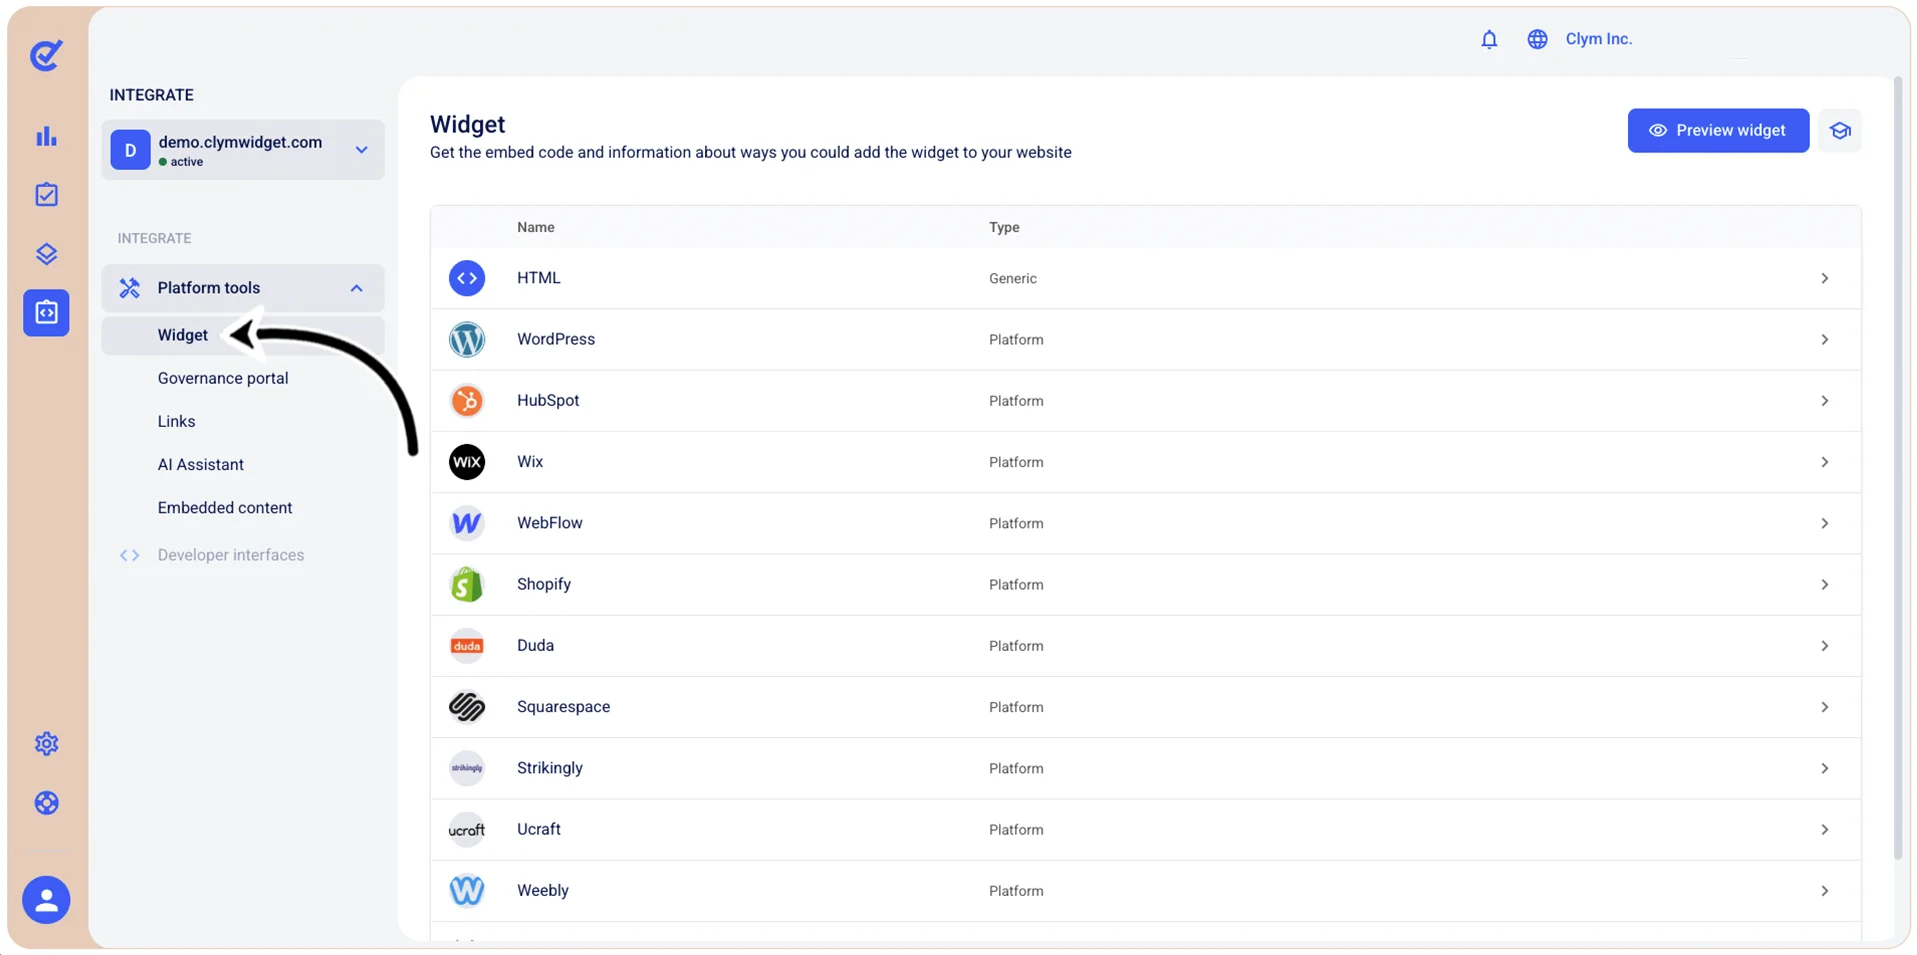
- Go to
 Integrate>Platform Tools>Widget.
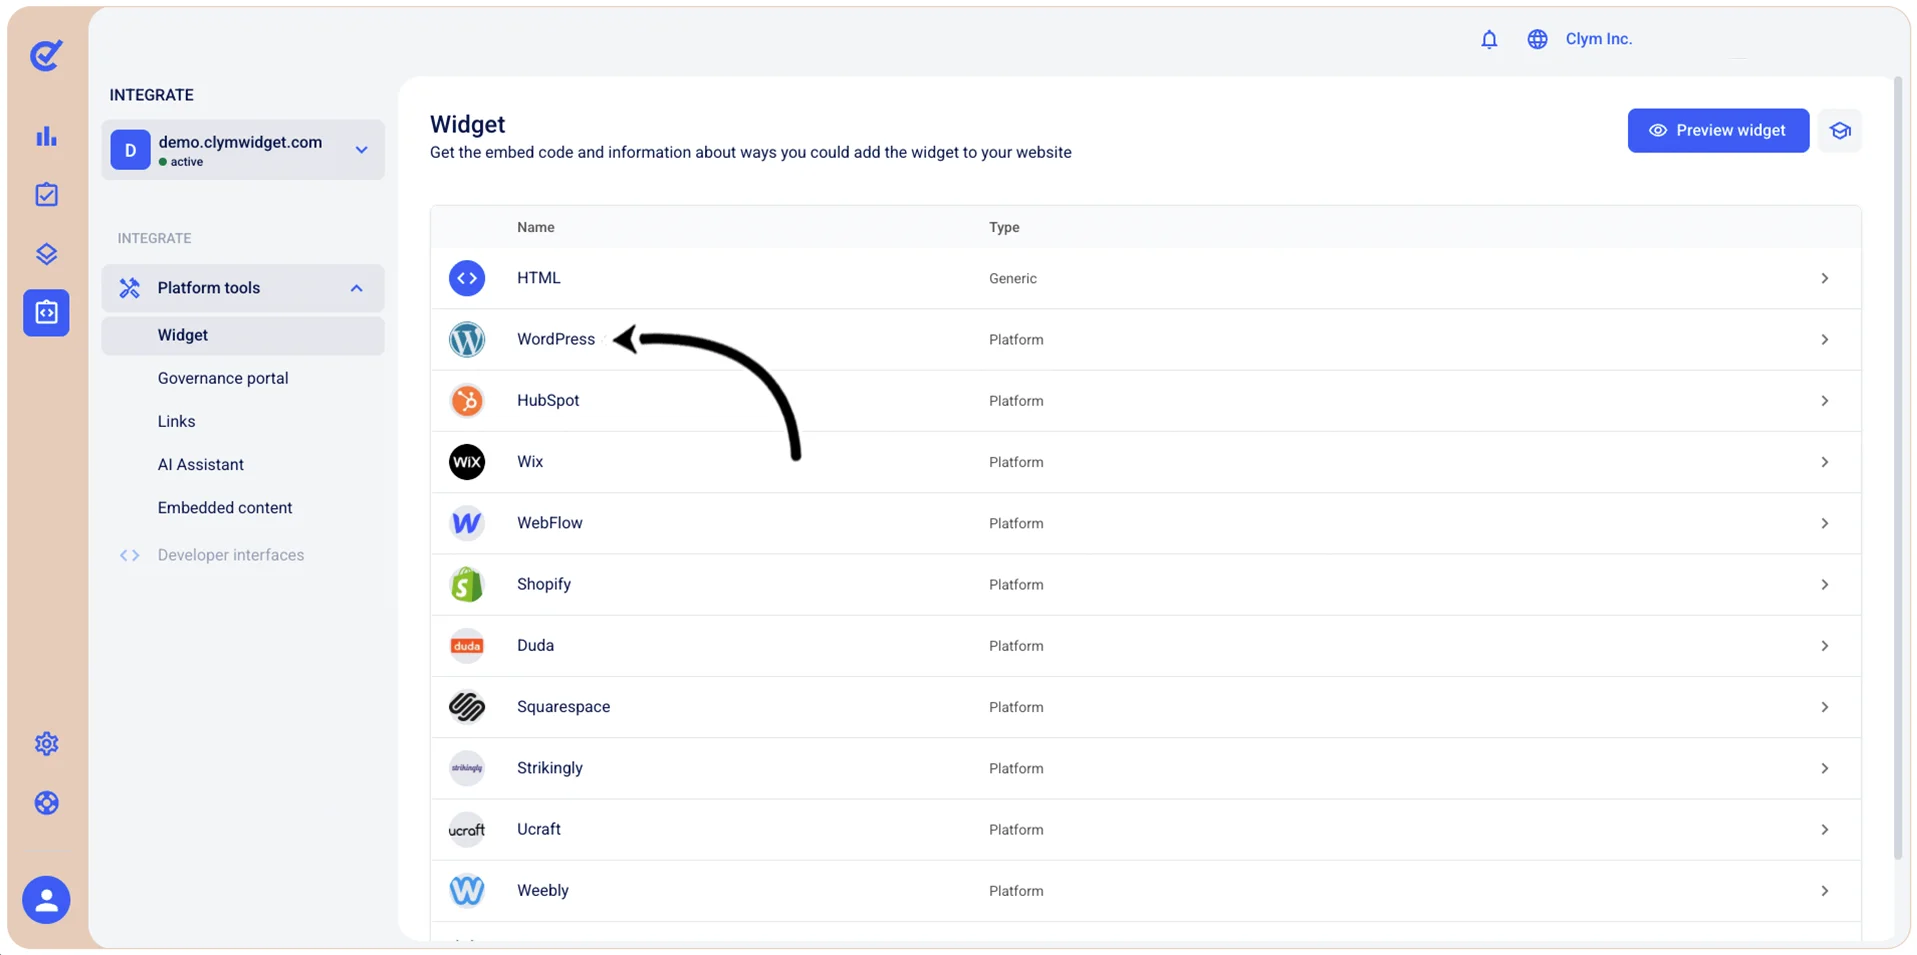
- In the Widget screen, select WordPress.
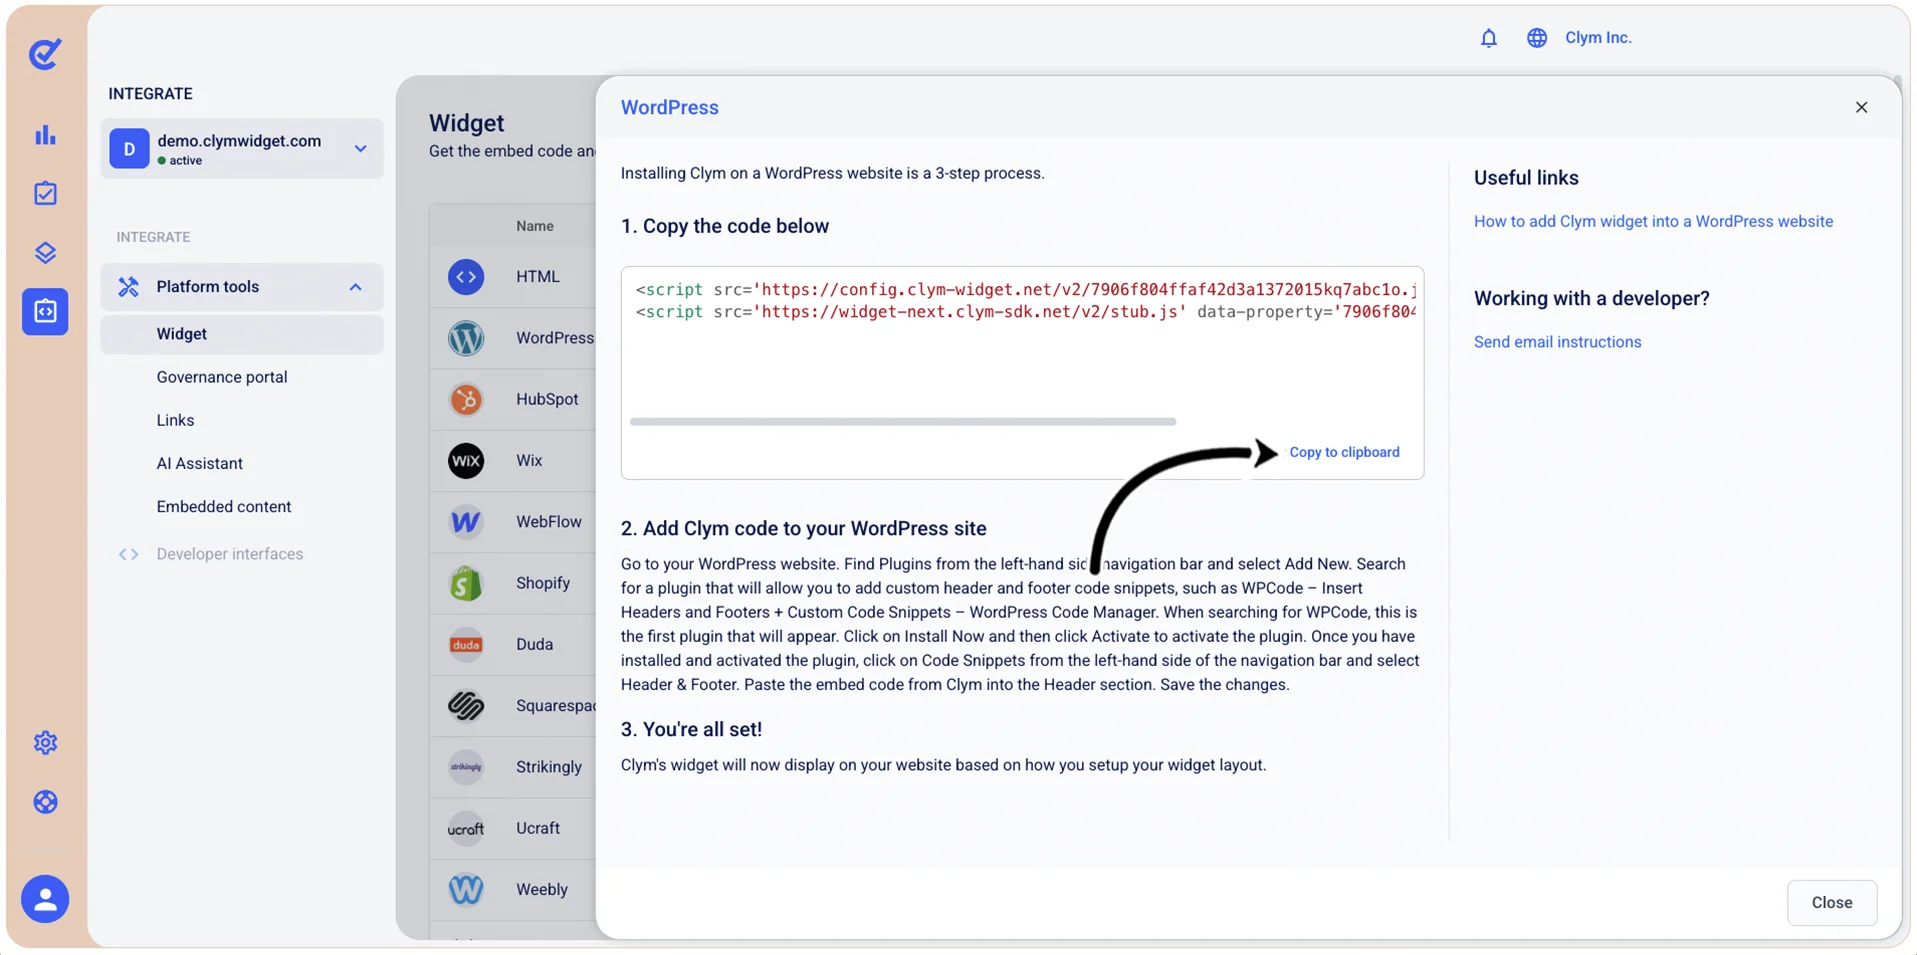
- In the WordPress screen, under 1. Copy the code below, select Copy to clipboard.
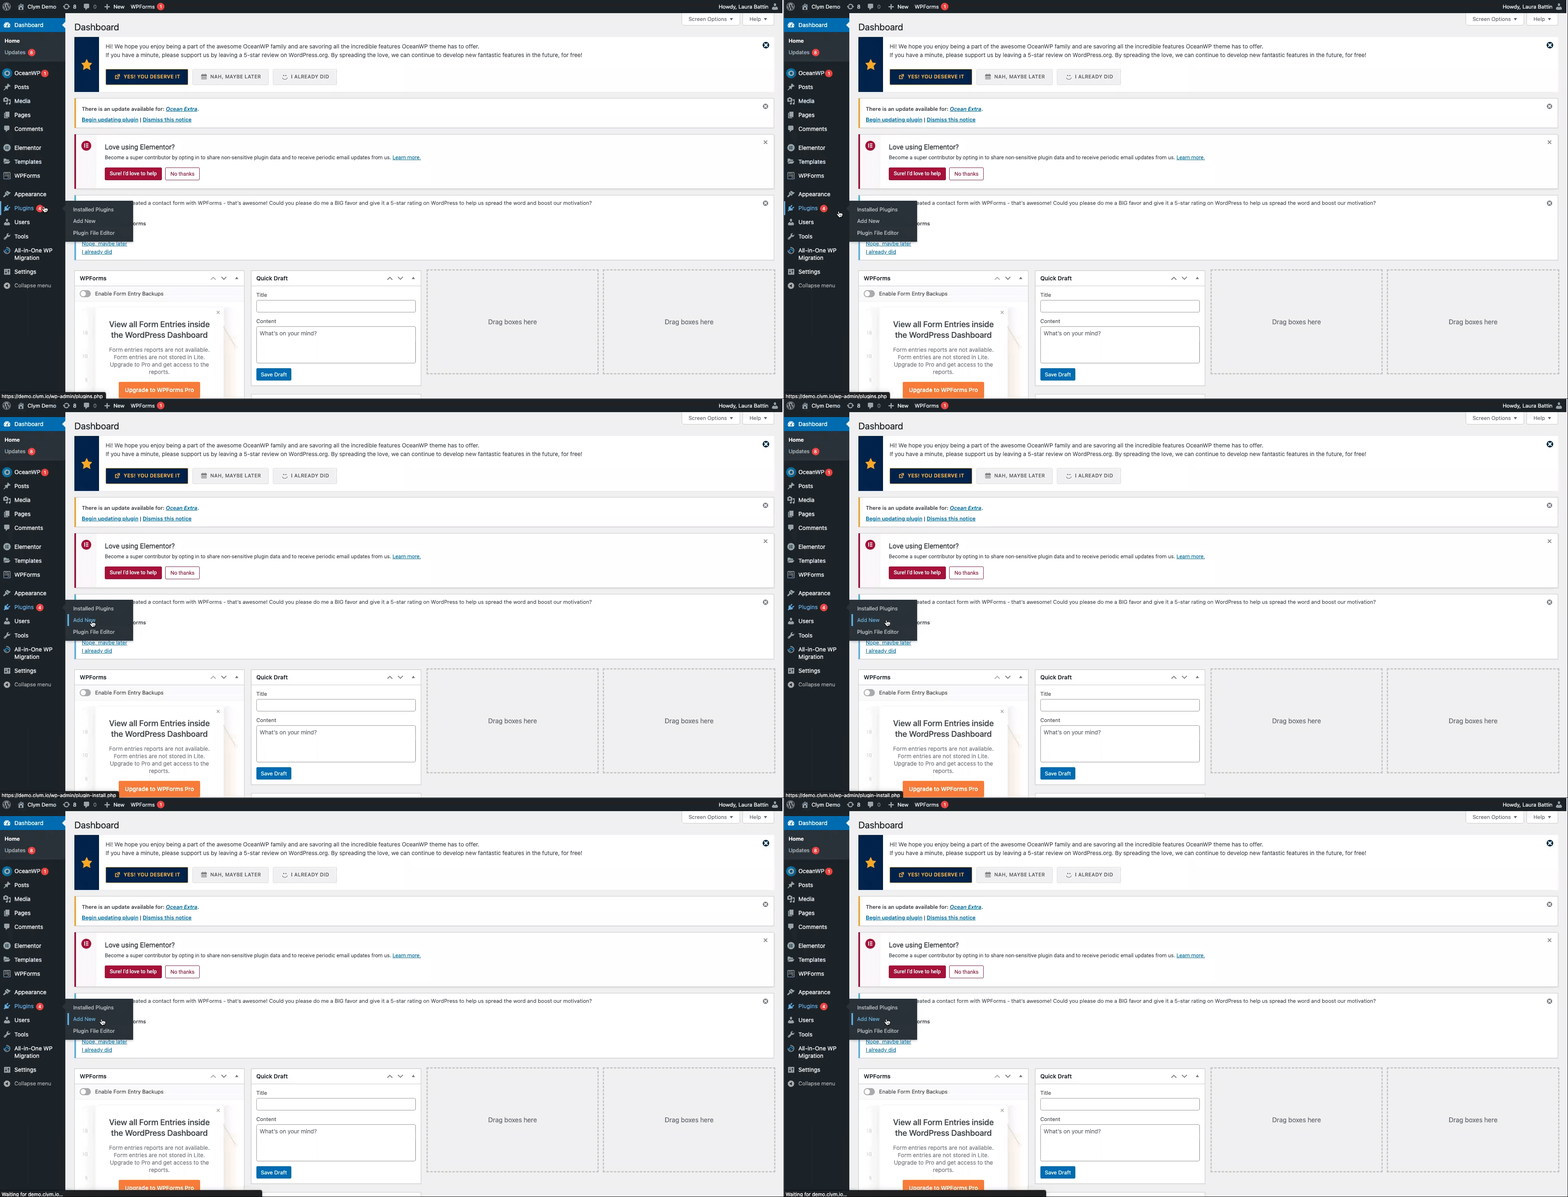
- Next, go to your website. In the WordPress dashboard, navigate to Plugins on the left-side navigation bar and select Add New.
- Search for a plugin that enables you to add custom header and footer code snippets (such as WPCode – Insert Headers and Footers + Custom Code Snippets – WordPress Code Manager) and select Install Now.
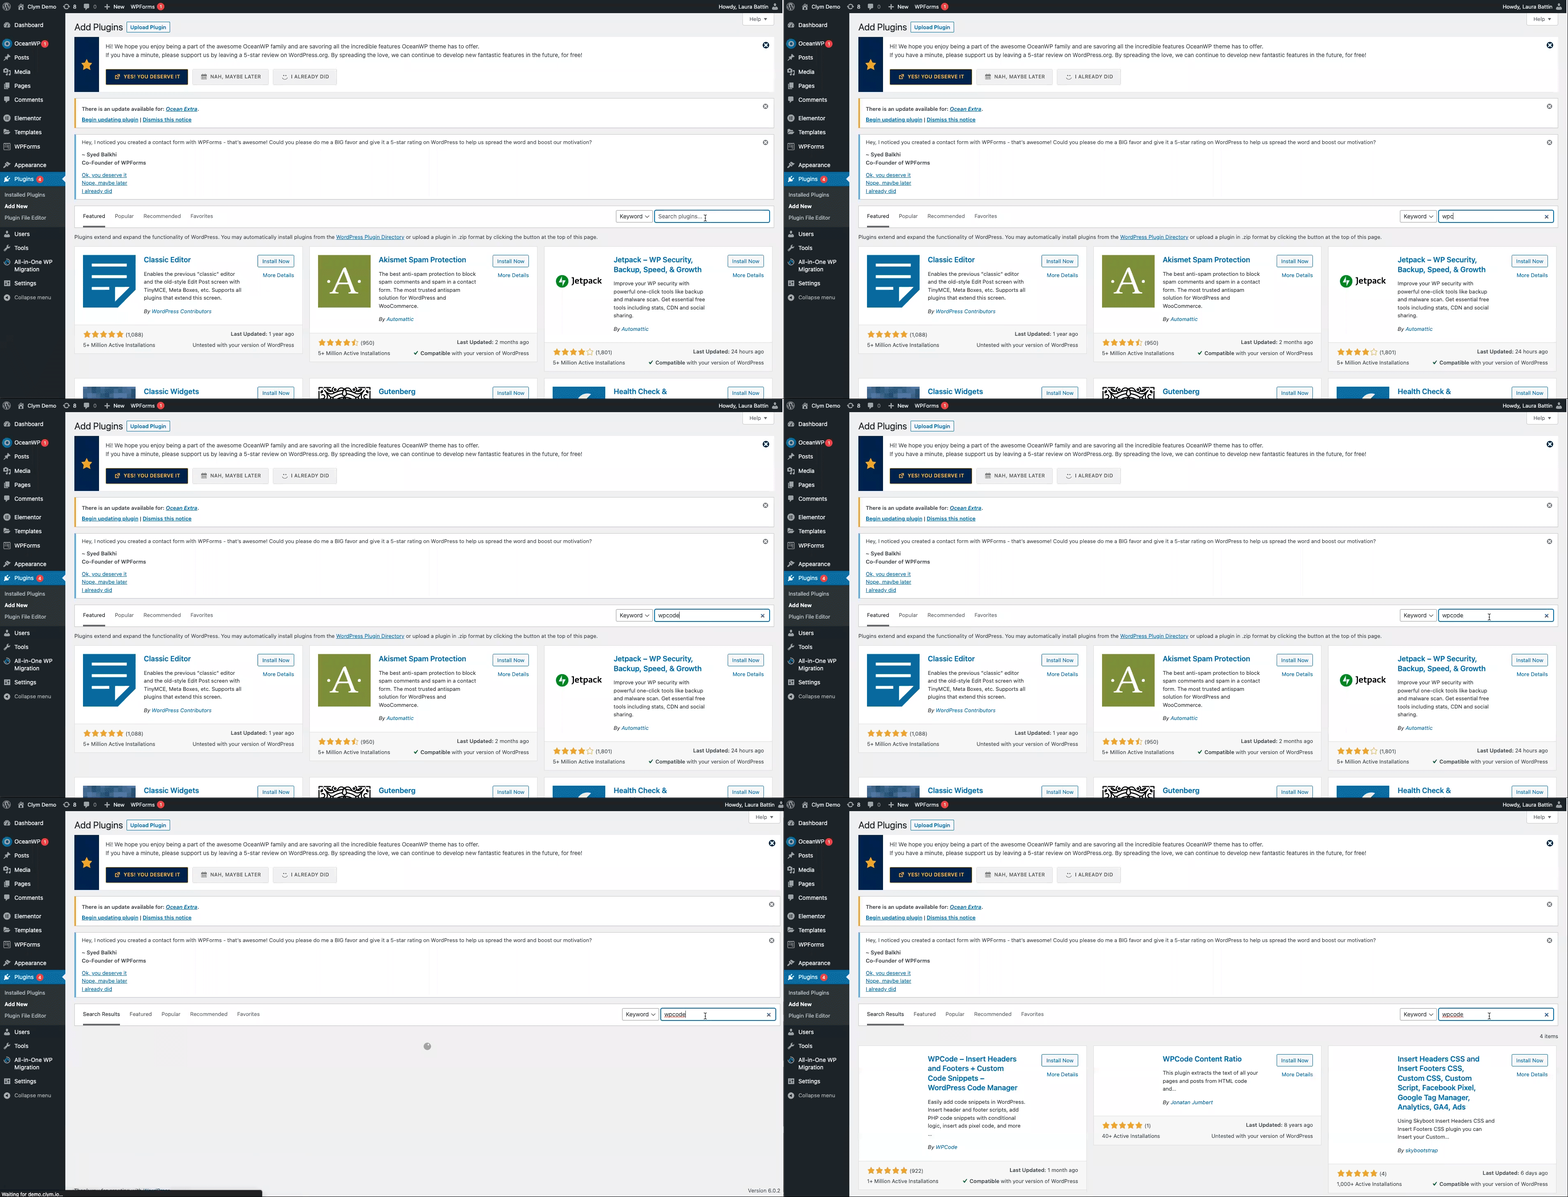
- When the installation is complete, select Activate.
- From the left-side navigation bar, go to Code Snippets>Header & Footer and paste the embed code into the header section.
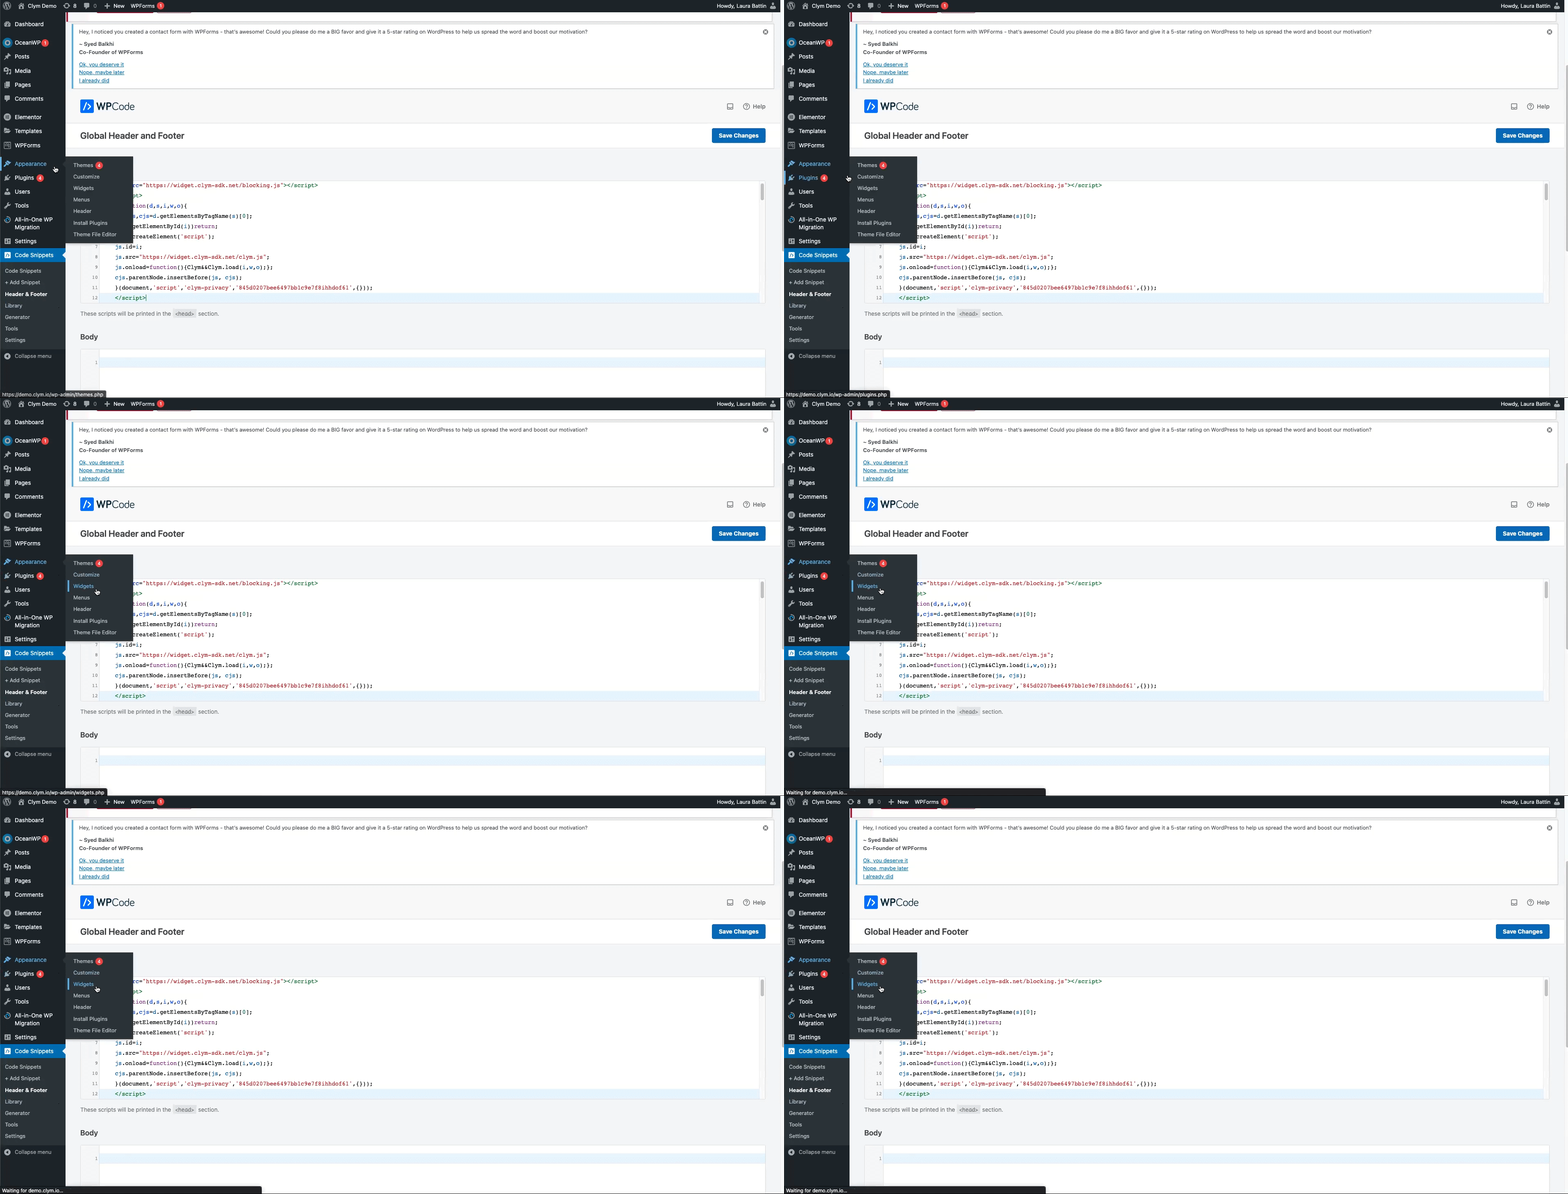
- When finished, select Save Changes.
Note: To facilitate compliance, the script needs to be inserted as the first script under the header section of your website. Failure to do so might allow third-party scripts to be loaded on your website which, depending on regulation, might result in non-compliance. For a better view, leave a space between the script and any following scripts or code.
If, at any stage, you discover that your website has a different setup, consult a developer or contact our support team for assistance.