
Install the Widget on a generic (HTML) website
- Go to
 Integrate>Platform Tools>Widget.
 - In the Widget screen, select HTML.
- In the HTML screen, under 1. Copy the code below, make sure to select Standard.
- Select Copy to clipboard.
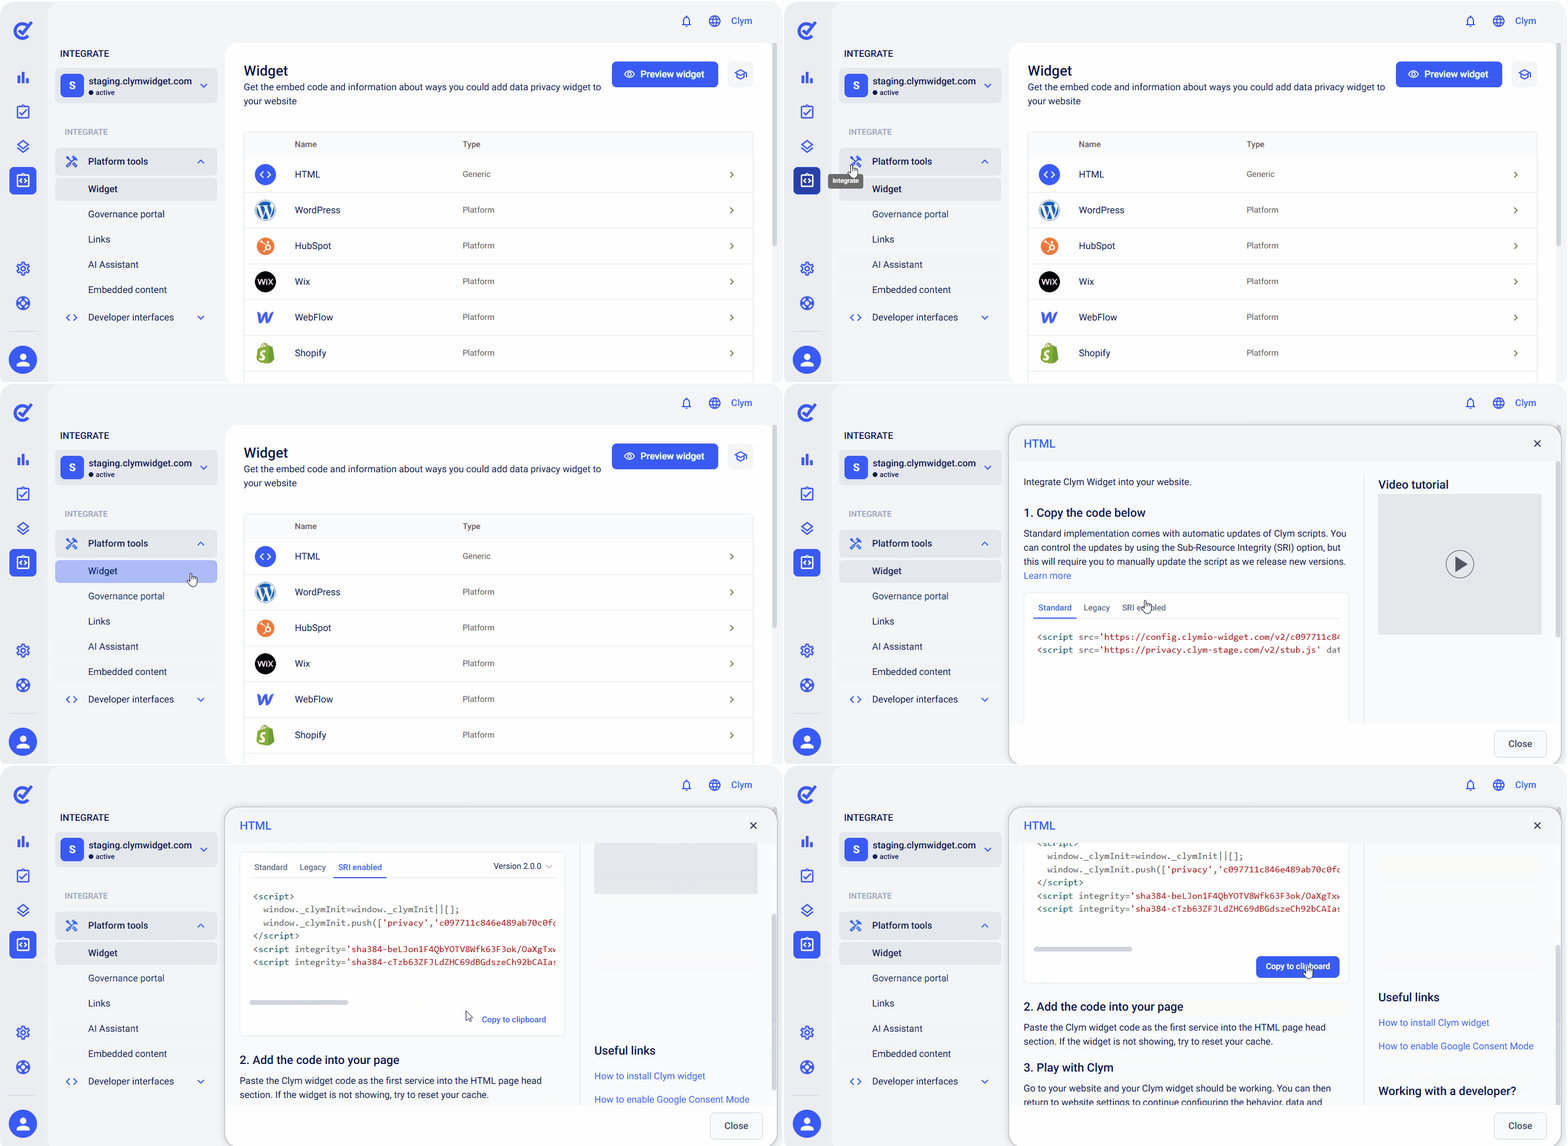
Important: Make sure the script you are copying is under the Standard tab, not Legacy. For information on script versions, see here.
Add the Embed Code to Your Website
- Go to your website and open the area where you edit the code for your website's header.
- Paste the HTML embed code at the very top of your header, right after the
<head>tag, above any of your other scripts. - To add space between your scripts, use the Enter or Return key.
Note: To facilitate compliance, the script needs to be inserted as the first script under the header section of your website.
Failure to do so might allow third-party scripts to be loaded on your website which, depending on regulation, might result in non-compliance.
For a better view, leave a space between the script and any following scripts or code.
Test the Widget
When finished, test and see if the widget is displayed. If the widget is not displayed, reset your browser cache and try again. For more information, contact our support team for assistance.
Advanced installation settings
Advanced Settings provide greater control over how your widget configurations behave, offering flexibility for performance optimization, data privacy compliance, and integrations with industry frameworks. Once enabled, Advanced Settings open up options to fine-tune how the widget loads, how scripts execute, and how consent signals are communicated to third-party services.
Note: To activate these features, your site must be running the Standard Script (v2), as they are incompatible with Legacy or SRI versions. If you are not yet using Standard Script (v2), we recommend that you install the Standard version of the script before proceeding with Advanced Settings.
Using Advanced Settings is especially useful if you need more precise control over privacy frameworks, consent mode integrations, or performance configurations. For example, Native Mode reduces widget size and improves speed by loading outside of an iframe, while Blocking Modes let you choose how strictly scripts are managed based on user consent. Advanced Settings also support temporary IAB stub signals and customizable behavior for Google and Microsoft Consent Modes, ensuring vendors receive the right information at the right time. Whether your goal is improving site performance, aligning with privacy regulations, or fine-tuning vendor integrations, these options allow you to adapt the widget to your organization’s needs.
Advanced Settings Requirements
To activate Advanced Settings on your website, implement the Standard Script version. These features are not compatible with the Legacy or SRI versions. For guidance on upgrading, see Migrate from the Legacy version to the Widget Standard version.